Wednesday, December 22, 2010

Salt and Pepper Chicken


Anyone who went to college in the Boston/Cambridge area has ordered from Quan's Kitchen at least once. Generous portions of greasy Chinese food, low prices, and delivery until 1am -- what more could a college kid want? Pulling an all-nighter to study for a test? Order some Quan's to keep your energy up. Hungry after a night of drinking with your friends? Greasy Chinese food cures hangovers. Tired of dining hall food? Q-U-A-N-S!


Quan's actually has pretty decent authentic Chinese food, but the majority of its young clientele are of the Kung Pao Chicken persuasion. Yuck. Dan used to be one of those people. Back when Dan was a Chinese food noob, he was a huge fan of the Orange Chicken at Panda Cafe. When he discovered Quan's, he loved the General Gao's Chicken. He eventually moved on to the Udon Noodles, and then finally settled into a long Salt and Pepper Chicken phase. In fact, after I graduated and moved away to start law school, Dan quickly fell into the habit of ordering SPC from Quan's multiple times per week, and sometimes twice a day. Delicious, yes. Healthy, no. Is he any fatter? No. Unfair!


Thankfully, since moving down here with me, Dan's eating habits have improved, largely because I am the Decider of Meals. But, even I still get the occasional Quan's craving, and after watching Dan gaze longingly at a fraternity brother's Salt and Pepper Chicken during our most recent visit up north, I decided to replicate the dish for him in our kitchen.

None of the recipes I found online seemed quite right, so I winged it. I chopped up a couple boneless chicken breasts into bite-sized pieces, dredged them in a flour/salt/pepper/garlic powder mixture, and pan-fried them in some olive oil. Result? Delicious! But not all were as crispy as they should be. I over-crowded the first batch in the pan, and the chicken took a long time to crisp up, and even then not by a whole lot. The second batch had room to breathe, and they not only cooked all the way through more quickly, but were also wonderfully crispy. Dan was a happy camper!

Salt and Pepper Chicken

Ingredients: (All measurements were eyeballed, so...good luck!)
- 4 thin boneless chicken breasts, chopped into bite-sized pieces.
- 1 cup flour
- Salt + pepper + garlic powder to taste (I used probably 3 tbsp salt, 1 tbsp pepper, and 1 tbsp garlic)
- 2/3 cup olive oil

Steps:
(1) In a medium bowl, mix flour, salt, pepper, and garlic powder until well combined.
(2) Add chopped, raw chicken to the mixture, and toss until each piece is completely coated.
(3) Heat olive oil in skillet on high heat.
(4) Cook chicken in two or three batches, making sure not to crowd the pan.
(5) Cook until chicken is golden and crispy.
(6) Serve with a big bowl of fluffy white rice.

Sunday, December 19, 2010

Mushroom Tart


This post is kinda misleading because I did not cook a single meal this week. Yup. It's true. Zero. Cooking. We ate out 3 out of the 5 days, ordered in another day, and the rest of the time we ate leftovers. The tart you see here was actually last weekend -- I just forgot to post it. Oops.


The thing about phyllo dough is that it's the best thing ever. Seriously. It's pre-made, keeps for a long time, can be used in a billion different delicious ways, and is perfectly buttery and flaky in a way that few home-made doughs are. Every time I read one of my favorite blogs and I see a tart with a perfect crust, I scroll down to the ingredients and immediately feel gratified when I see that they used phyllo dough. It makes me feel so much better about my own struggle with making dough from scratch.


I originally made this tart in preparation for lunch with a college buddy that was in town for residency interviews. BUT, she is a jerk and decided to stay home and eat her mom's homemade Chinese food for lunch instead. How rude! Kidding, kidding.

In the end, the tart was devoured by me, Dan and Emily. The crust was flaky and buttery, the cheese was gooey and savory, and the mushrooms were fragrant and delicious. So good fresh out of the oven, and surprisingly still tasty the next day...even if the crust was a tad soggy.

Recipe** courtesy of the Kitchen Wench.

**Just a couple comments about the recipe:
(1) If you don't have goat cheese, just use 4 oz of cream cheese instead. It was still tangy and delicious.
(2) I made two tarts, and forgot to add egg to the topping mixture for one of them. I actually liked that one a lot better -- it was a lot more creamy/melty.
(3) I cut up big chunks of fresh mozzarella and layered it over the top of the tart, then sprinkled some sea salt on top for extra flavor. If you like pizza that has ropes of cheese pull away with every bite, you'll definitely want to do this.

Thursday, December 16, 2010

Homemade Oreo Cookies


This week has been a blur of cookie baking. Not cake, not pie...just cookies. Thumbprint cookies, key lime pie cookies...and now homemade oreo cookies. Phew! 


Why so many cookies, you ask? Because just as I was pondering what to get everyone at the office for Christmas, the good people at HR sent out an email last week reminding us that while it's holiday season and everyone is full of good cheer, there are rules for gift giving. No bribes. No gift/job offer exchanges. Nothing expensive. Luckily, nobody wants to bribe a law clerk, I have a job, and I can't afford to buy expensive gifts anyway. What I can do is make lots and lots of cookies. Cookies for everyone!

Festive thumbprint cookies for the nice courtroom clerk and deputy US marshals; key lime pie cookies for the judge's administrative assistant (KL pies are her favorite dessert); and Oreo cookies for the Judge himself (he's always eating packets of weird-looking oreo knock-offs at lunch...yuck).


I have to confess, I've never been a big fan of Oreos. What's so great about crispy cookies anyway? All they do is dry out your mouth and leave you craving a glass of milk. And don't even get me started on how little love I have for milk. What I'm saying is, I'd take a big gooey brownie over an Oreo any day, even if it's kind of really fun to twist apart the cookies and try to guess which side the frosting is going to be on...

Anyway. These homemade Oreos are amazing! I thought they were going to be soft and chewy like Oreo Cakesters, but they really are exactly like regular Oreos...only better. The chocolate cookies themselves are crispy with just a hint of chew, and the vanilla cream filling (the best part of every cookie sandwich) is light and sweet, and not at all artificial-tasting. These would be perfect alone or...sigh...dunked into a tall glass of icy cold milk.

Recipe can be found here.

Sunday, December 12, 2010

Almost No-Bake Cheesecake


True or false: I have been dying to get my hands on some mini spring-form pans so that I can make adorable, baby-sized cheesecakes? True. So true! I'm a total sucker for miniaturized versions of regular things. In college, my dorm was filled with all kinds of crap that I bought for the sole reason that they were tiny and cute. Miniature condiment jars, tiny milk cartons full of candy, baby staplers...I've gotten better with age, but sometimes I still can't help myself.


Look at how cute my new pans are! And they're so useful for portion-control. Now, instead of filling my fridge with a full-sized, fat-filled cheesecake, I can make tiny, guilt-free portions of the same delicious treat. Nevermind that Dan thinks it defeats the purpose when I end up making four mini-cheesecakes per batch anyway...


The beauty of this cheesecake is that it doesn't need to be baked. It just gets mixed and chilled over night before being served. The only reason it's called "Almost No-Bake Cheesecake" instead of "No-Bake Cheesecake" is that the graham cracker crusts spend a little time in the oven before the filling goes on top. Still, the cheesecake itself doesn't need to be baked at all.


This was my first time eating un-baked cheesecake, but I've decided that I'm never going back to baked cheesecake again. Each bite was just so light and fluffy in it's creaminess, not super dense like a regular cheesecake. And, whereas regular cheesecake sits like a rock in your stomach after just one slice, this cake slides down so easy and you don't feel like you've eaten much of anything at all. Guilt free! And...very dangerous for dieters! It's like Emily said after we demolished an entire cheesecake despite being uncomfortably full from lunch -- "It's scary how easy it is to eat this."

Almost No-Bake Cheesecake (Adapted from Closet Cooking's No-Bake Cheesecake recipe)

Ingredients: Makes enough for 2 4-inch springform pans.
(Crust)
- 1/2 cup crushed graham cracker crumbs. (About 8 crackers)
- 1 tbsp melted butter
- 1-1/2 tbsp brown sugar

(Filling)
- 8oz cream cheese
- 1/2 cup heavy cream, whipped
- 1 tbsp lemon juice
- 1/4 cup sugar

Steps:
(1) Preheat oven to 325.
(2) Mix graham cracker crumbs, melted butter and brown sugar. Press into the bottoms of 2 4-inch spring form pans.
(3) Bake crust for 8 minutes. Set aside.
(4) In a large bowl, whip heavy cream with an electric beater until thick. Set aside.
(5) In a medium bowl, cream together sugar, lemon juice, and cream cheese. Gently fold into whipped cream mixture until well combined.
(6) Evenly divide filling between two pans, pouring it on top of the crust in each pan.
(7) Chill in the fridge overnight.
(8) Serve plain or with fruit topping.

Friday, December 10, 2010

Stuffed Pork Chops with Gravy


Apparently Thursdays are now "pork chop" days, because this is two weeks running that we've eaten pork for dinner. What can I say, I'm unimaginative in my eating. Also, I still have a million pork chops in the freezer that need to get eaten. And I just love pork, period. It's like Anthony Bourdain once said on an episode of No Reservations -- "the pig is a noble and delicious animal." So true, Tony, so true.


I've never stuffed anything other than a chicken, and so I had to look up what it meant to "butterfly" a pork chop. Apparently it's just a fancy way of saying "stick a sharp knife into the side of a chop and cut a little pocket." So that's how you stuff a pork chop! I've always wondered. Seriously.


The recipe I found online called for stuffing the chops with a mixture of blue cheese/bacon/chives. That sounded too salty, even for me, so I went with a more traditional stuffing route. Bread cubes, melted butter, chicken stock, and onions. I used whole wheat bread, but I think corn bread or white bread would be tastier.


After stuffing, the chops get browned on both sides in a hot skillet, and then transferred to a greased pan for baking in the oven. Only 25 minutes, and you're digging into a piping hot pile of porky goodness. Time in the oven didn't dry the meat out at all, and the savory stuffing was a perfect compliment to the juicy, delicate chops. Delicious!

Stuffed Pork Chops with Gravy

Ingredients:
- 2 pork chops, butterflied
- 2 slices bread, chopped into cubes
- 1 tbsp butter, melted
- 1/4 cups chicken stock
- 1 tbsp diced onion
- Salt + pepper for seasoning
- 1 tbsp olive oil
- 1 tbsp minced garlic

Steps:
(1) Preheat oven to 325.
(2) In a small bowl, combine bread, butter, chicken stock, and diced onion until desired stuffing consistency is reached. Set aside.
(3) Season pork chops on both sides with salt and pepper to taste.
(4) Stuff each chop with heaping spoonfuls of stuffing.
(5) In a hot skillet, cook garlic in olive oil until fragrant. 
(6) Add pork chops and brown on both sides. Remove chops from skillet and place in greased pan. (Save oil/fat from skillet)
(7) Stick everything in the oven and cook for 25 minutes.
(8) Serve with favorite gravy.

Homemade Gravy

Ingredients:
- Leftover oil/fat from browning chops in the skillet.
- 1/2 cup chicken stock
- 1/2 cup heavy cream
- 2 tbsp flour

Steps:
(1) Heat skillet with leftover oil/fat from pork chops.
(2) Add chicken stock and heavy cream. Bring to a boil, stirring constantly.
(3) Keep stirring until liquid has noticeably reduced.
(4) Add flour, and stir until well mixed.
(5) Season to taste with salt/pepper.

Thursday, December 2, 2010

Baked Italian-Style Breaded Pork Chops


There is way too much food in our freezer. We've got a billion packets of bacon, tubs of uneaten ice cream, endless gallon bags stuffed with steaks, chicken breasts, pork chops, salmon filets and tilapia. I think there might even be a container of scallops somewhere in the back. Why? Because we live a block from BJ's, and I just can't help myself. 

So, I've been cooking frantically this week in a effort to open up some space in the freezer. I used up the frozen shrimp for carbonara on Monday, chicken for my lunch salad on Tuesday, and grilled steak for dinner last night. In an effort to keep things exciting in the kitchen, I decided to make pork chops tonight.


We've already had glazed, grilled chops two or three times in the last few months, and I felt it was time for a change. Closet Cooking was no help this time, because all of his recipes were a little more involved than I felt like dealing with at 7 o'clock on a Thursday night, and they called for a slew of ingredients I didn't have on hand. Plus, I was tired of using the electric grill for our dinner meats. Lucky for us, I had all ingredients to make breaded, baked pork chops.


This wasn't exactly a Rachel Ray-esque 30-minute meal, but the pork chops were very straightforward and easy to make. Both chops were seasoned, breaded, and browned in no time at all, and while they were baking in the oven, I had time to whip up a make-shift version of creamy au gratin potatoes, and sit down with a former DEA agent to answer a few quick back-ground investigation questions for Emily's new job. What can I say, I'm a multi-tasker.


I think I prefer the savory, caramelized crust on my glazed grilled pork chops better than the Italian-style breading of these chops, but overall I would rate this dish as "tasty." The meat was tender and juicy, and very flavorful. I'm glad I decided to salt/pepper the chops directly pre-breading though, because I think without that seasoning they would have just been bland and greasy.

Baked Italian-Style Breaded Pork Chops (Adapted from AllRecipes.com's Italian Breaded Pork Chops recipe)

Ingredients:
- 1 egg, lightly beaten
- 1 tbsp milk
- 2/3 cup Italian seasoned bread crumbs
- 1/3 cup grated Parmesan 
- 2 tbsp dried oregano
- 1 tbsp olive oil
- 2 cloves garlic, minced
- 2 pork chops

Steps:
(1) Preheat oven to 325.
(2) In a small bowl, beat together the egg and milk. In a separate small bowl, mix the bread crumbs, Parmesan, and oregano.
(3) Heat the olive oil in a large, oven-proof skillet over medium heat. Stir in the garlic, cook until brown.
(4) Dip each pork chop in the egg mixture, then the bread crumb mixture. Make sure each chop is evenly coated.
(5) Cook the chops on the skillet until lightly brown on each side. 
(6) Place the skillet/chops into the oven. Cook for 25 minutes.

Tuesday, November 30, 2010

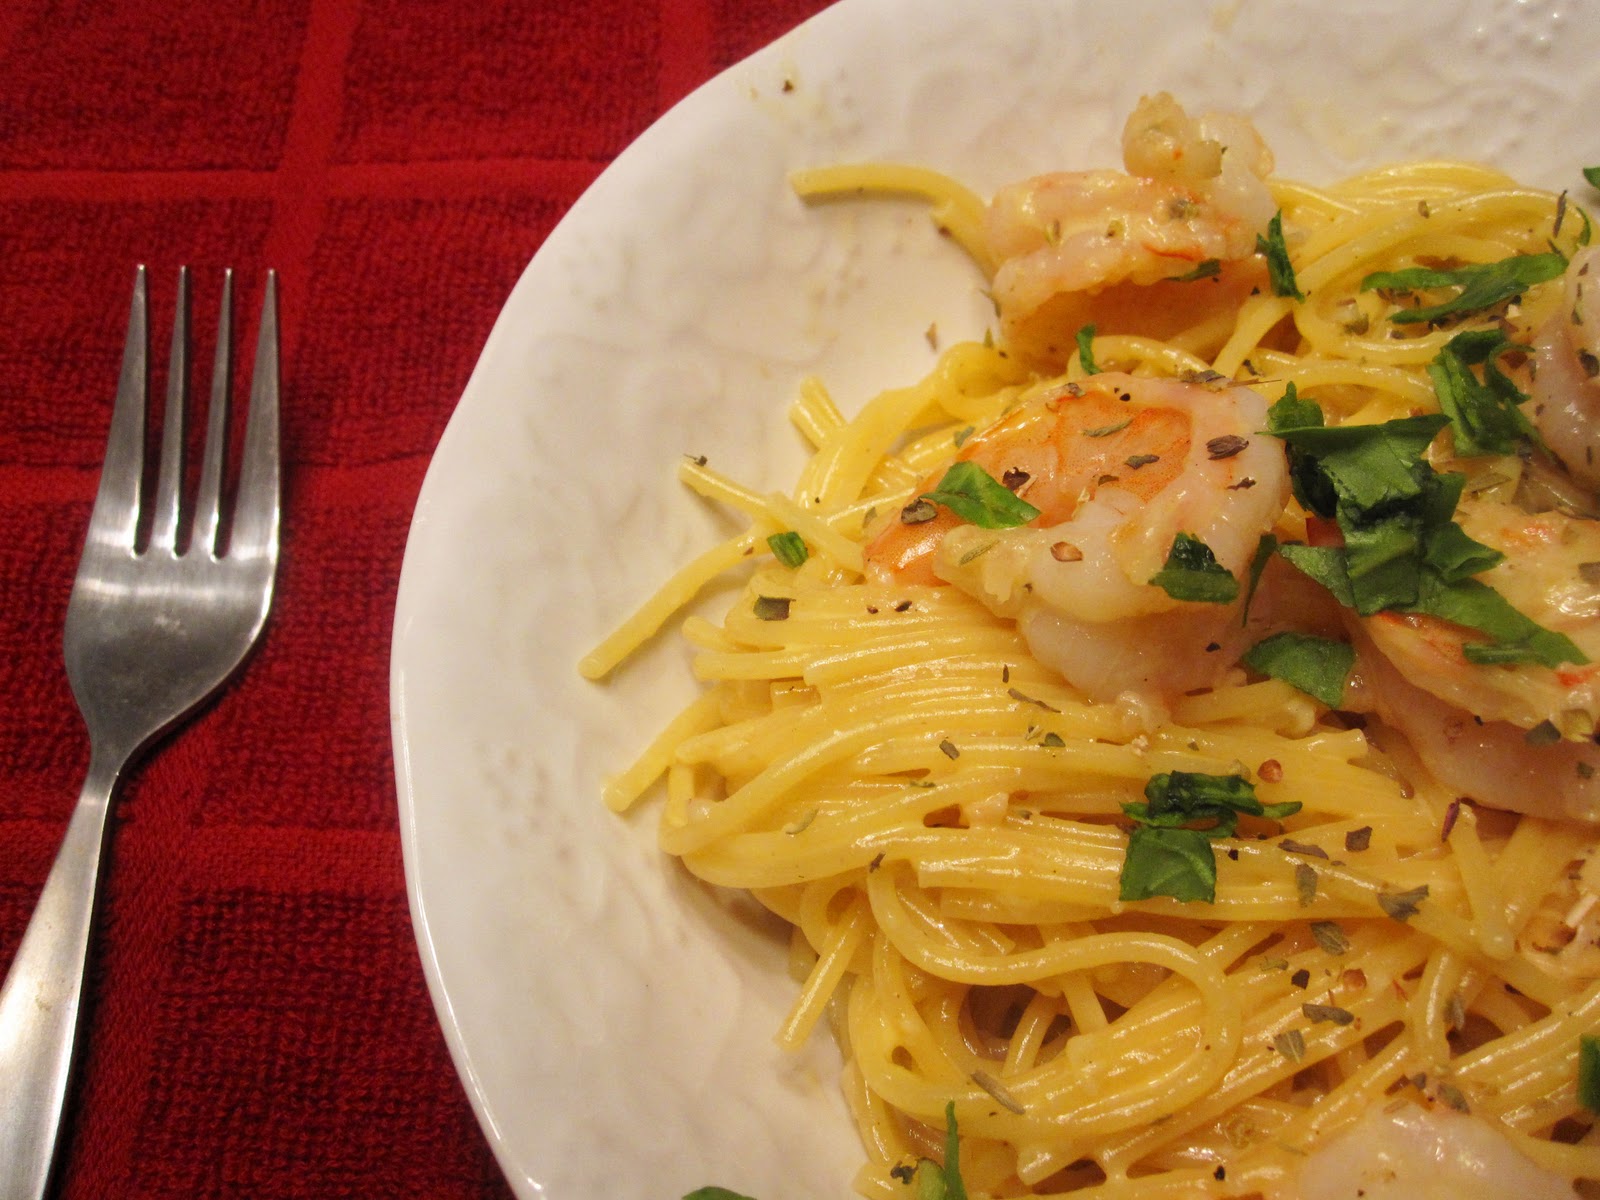
Shrimp Carbonara


Dan was feeling under the weather today and had to leave work early. What does one feed to a sick person? Ginger ale and soda crackers? How boring! And so sad. I figured something heartier would perk his immune system up faster. 


I've been reading Closet Cooking a lot lately, and the guy loves his shrimp. He's got recipes for Thai Lemon Shrimp, Shrimp Scampi, Shrimp Po' Boys...just to name a few. He also had a great recipe for Shrimp Carbonara, and I just happened to have all the ingredients to make it. Shrimp has a lot of protein in it, right? And I'm pretty sure I read somewhere that carbohydrates do a body good.


The dish came together super quickly and was amazingly delicious. The shrimp was plump and tender, and while I didn't have any linguine, spaghetti worked wonderfully with the creamy, cheesy sauce. Dan gobbled down a heaping bowlful before crawling back onto the couch for a nap. He's looking better already!

Shrimp Carbonara (Adapted from Closet Cooking's Recipe)

Ingredients:
- 1/2 box of linguine (or spaghetti)
- 4 slices bacon
- 1 lb shrimp, peeled/de-veined
- 1 clove garlic, chopped
- 1 egg yolk
- 2 tbsp heavy cream
- 1 cup grated Parmesan
- 1 tbsp parsley, chopped

Steps:
(1) Start cooking the pasta.
(2) In a medium-sized pan, cook the bacon. Set bacon aside and get rid of all but 1 tbsp of the bacon grease.
(3) Add shrimp and garlic to the bacon pan, saute until just cooked.
(4) In a separate bowl, mix yolk, parmesan, and heavy cream. Season with salt/pepper to taste.
(5) Drain pasta, then add it to the pan. Toss until shrimp and pasta are well-combined.
(6) When sizzling sounds stop, pour egg/cheese mixture into the pan. Toss until pasta is well-coated.
(7) Serve with parsley sprinkled on top.