Showing posts with label Yeast. Show all posts

Wednesday, September 21, 2011

Brioche Buns


Guys, making bread is hard. Or maybe I'm just really bad at it. Either way, my dough just doesn't rise the way it's supposed to. Either my yeast is sluggish, or I'm killing them. I could swear I did everything right this time, though -- I let the yeast percolate in warm sugar water...I didn't use scalding milk or acidic buttermilk...I let the dough rest in a warm place...I even toned down my stirring/kneading just in case too much vigorous activity scared the little suckers. But nope. Dough only rose a little bit. Goddamnit.


I mean, these brioche buns turned out OK, but they're definitely not as light and fluffy/puffy as they should've been. And, my egg wash didn't give them a gorgeous, shiny sheen like it was supposed to. In fact, I would say that these buns are more biscuit than brioche. Which is why I decided to eat one smeared with cherry butter for breakfast instead of using it as a burger bun. It was edible. It was tender. It was tasty, even. But it wasn't brioche. Sigh. 

Recipe can be found here, courtesy of the Kitchen Simplicity blog.

Friday, April 8, 2011

Kale and Lemon-Pepper Chicken Pizza

(I got a new camera! Can you tell?)

Both the Pioneer Woman and the Crumbly Cookie assured me that their favorite pizza dough is at its best the longer it's kept in the fridge, so I took their advice and let the second half of my dough chill for a few days. I didn't have the patience to wait 3-4 days, but I figured that two days was plenty, so I pulled the dough out of the fridge today for another round of pizzas.


Now that I know what kale is, I'm eager to work it into my vegetable rotation. I bought a big bag of it at BJs the other day, but have been kind of at a loss as to what to do with it. I mean, I ate it bunch when I was younger, but I'm pretty sure my parents just sauteed it and served it with rice. Sauteed kale is delicious, of course, but there's gotta be more you can do with it, right? Toss it onto a pizza with chunks of tangy, savory lemon-pepper chicken, for instance?

Man, when I tell you this pizza was delicious...you really need to take my word for it. The dough, which had become even more malleable with a few extra days in the fridge, was perfectly tender and chewy, and had a smoother and more uniform consistency/texture than my last batch. The saltiness of the sauteed kale complemented the tangy-peppery-ness of the chicken, and in the absence of sauce, the gooey melted mozzarella was the deliciously fatty glue that held it all together. Nom nom nom!


Kale and Lemon-Pepper Chicken Pizza 

Ingredients: (makes 3 personal pizzas)
- 1/2 of the pizza dough from the Pioneer Woman's recipe
- 3 tsp olive oil + more for greasing baking pans
- 2 cups kale, chopped
- 2 cups shredded mozzarella cheese
- 1 chicken breast
- 1/4 cup lemon juice
- Salt/pepper to taste

Steps:
(1) Preheat oven to 500.
(2) Grease two baking pans with olive oil, making sure entire surface is coated in oil.
(3) In a pan, cook kale on medium-high heat with a dash of salt until leaves are just wilted. Set aside.
(4) Cut chicken breast into strips, and season each side with salt and lots of pepper. Soak chicken strips in the lemon juice for about 10 minutes. Cut into bite size pieces, then set aside and start prepping the pizza dough.
(5) Cut dough into 3 pieces. Take one piece of dough, lightly flour both sides, and then stretch and smooth into the desired shape/thinness. Do this with all three pieces. Please stretched dough into baking pans. (I used a 13x9 cake pan + 9x9 square pan)
(6) Spread 1 tsp on the surface of each pizza.
(7) Divide 1 cup mozzarella between 3 pizzas.
(8) Divide cooked kale and chicken bits between 3 pizzas, spreading them evenly on top of the mozzarella.
(9) Sprinkle remaining cup of mozzarella between 3 pizzas, on top of the chicken/kale mixture.
(10) Bake for 8 minutes, or until cheese is bubbly.

One year ago: Blueberry Cheesecake Bars

Thursday, April 7, 2011

Pepperoni Pizza


Mmm, pizza. Pizza pizza pizza. Is there anyone in the world who doesn't love pizza? Show me a person who says they don't like pizza, and I'll show you a liar. I mean, what's not to love about it? Tender (or crispy, or chewy) crust...tangy or creamy sauce...gooey melted cheese...and any yummy topping you could possibly want or think of...Is it any wonder that "Pizza Day" is basically every single kid's favorite day in the lunchroom?

Dan and I are very loyal Domino's customers (Pizza Hut has better wings, though), but I've been dying to make my own pizza for a while now. The Crumbly Cookie blog had a few tasty-looking posts about homemade pizza last year, and they've been sitting in my queue of bookmarked "must try" recipes since. But, with my repeated failed attempts at handling yeast, I had no confidence in my ability to make pizza dough, so I put off doing it, rationalizing that I couldn't make pizza properly anyway since, hey, no pizza stone. Then, this past weekend my stunning success making focaccia gave me a huge boost of confidence, and I figured, hell, let's try pizza!

(Yuck, this pizza did NOT photograph well...tasty though!)

I've been  really into the Pioneer Woman lately, so I actually went with her pizza recipe instead of Crumbly Cookie's, although as far as I could tell, their recipes were substantially similar if not identical. Yeast, flour, and salt mixed together, followed by a slow, cold rise in the fridge over night. My luck with yeast held, and the dough was wonderful. After many hours in the fridge it was more stretchy than sticky, despite not having as much flour as you'd expect, and it was easy to pull and stretch it into the shape and thinness I wanted. Awesome!

For the sauce, I cheated and went with store-bought Ragu. What can I say, I was feeling lazy, I didn't have crushed tomatoes or tomato paste, and Ragu is perfectly good pizza sauce in a pinch! Anyway. After saucing the dough, I loaded it down with shredded mozzarella, colby jack, parmesan, and pepperoni slices. 10 minutes at 500 degrees later, Dan and I were sitting down to a very delicious, cheesy, tender-crusted homemade pepperoni pizza. A very satisfying dinner, with plenty leftover for Dan's lunch. I still have enough dough for another pizza, so...keep your eyes peeled for another pizza post soon,  probably with white sauce and lots of vegetables.

Recipe can be found here, courtesy of The Pioneer Woman.

Saturday, April 2, 2011

Focaccia


OK, can we all take a moment to reflect on the fact that I successfully handled yeast today with 100% success? For the first time in almost a year full of botched bread-making attempts, everything that was supposed to happen, happened. The yeast foamed; the dough came together and then rose beautifully; and the bread baked into a fragrant, golden loaf of awesomeness that filled the kitchen with its delectable, onion-y, garlicky, rosemary-y scent. At the risk of being repetitive...awesome.


For once, I have no back story to explain my motives for making this recipe. I just love focaccia. I mean, I've never met a loaf of bread I didn't like, but focaccia is my absolute favorite. It's so chewy and flavorful, and perfect before or during any meal. It's wonderful when eaten plain, smeared with roasted garlic, dipped in olive oil, or made into a sandwich. And, it can be made with any toppings you like. No bread has ever been so versatile, or so delicious.


For a wonderful recipe, check this one out, courtesy of Tyler Florence and the Food Network.
** Recipe note: The recipe calls for 3.5 to 4 cups flour, but I only used around 2.5. For whatever reason, that was all it took for my dough to come together. I would suggest that as soon as your dough becomes smooth, pliable and non-sticky, stop adding flour, no matter what the recipe says.

One year ago: Hot Cross Buns

Thursday, March 24, 2011

Brioche


OK, so the other day I was reading a super dorky food-themed manga about a kid that's really good at making bread. Like, really good. Better than every other baker in the world, in fact, despite zero professional training. And this is all because he has these "solar hands" that are naturally super warm so that when he kneads his dough the heat really gets the yeast going, the whole thing comes together and rises a lot faster than normal. As a result, his breads are always perfectly moist and fluffy, with the just the right amount of crustiness for each type of bread he makes. Seriously, his bread is so good that one bite will literally kill you with its awesomeness. Totally nerdy and improbable, but the story really got me excited to make some bread. 

Why brioche? Because a guy I knew in college (who is secretly a rock star in the kitchen) recently posted some really yummy looking pictures of the grilled cheese on homemade brioche he had made, and that  immediately made me want to make my own batch of bread so that I, too, could eat delicious grilled cheese and brioche sandwiches. What can I say, I am easily influenced by the whims of others.


I know it's not real and all, but...I would love to have me some "solar hands." Seriously, I can use all the help I can get when it comes to working with yeast. My doughs just don't rise properly!  Although, that may have less to do with my hand temperature and more to do with the fact that I am sometimes a moron in the kitchen.  When I made those embarrassingly scone-like hot cross buns, I screwed up because I substituted buttermilk for regular milk in the recipe, and all that acid killed my yeast. Then, when I failed at making dinner rolls, the yeast died once again when I poured scalding milk over it. Poor little bacteria...they never stand a chance. Still, I was determined to succeed this time and have the best dough-rising experience ever.

(Sad, poorly-risen dough) 

Everything was going great until the recipe told me to slather butter over my dough and knead it until the butter was incorporated. I had halved the recipe because I only wanted one loaf of bread, but everything seemed fine. First, my yeast was percolating happily in lukewarm water, then my dough came together without a hitch. But then that butter came along and everything fell apart.

In retrospect, I may have been overzealous with my buttering. I know brioche is supposed to have high egg/butter content, but...this may have been too much. I forgot entirely that I had halved the recipe, and ended up slathering on twice as much butter as I intended to. I kept kneading and kneading, hoping the butter would incorporate, but the slickness of the dough made it impossible to have a smooth kneading experience. For the most part it felt like I was folding a doughy piece of paper, but after about 10 minutes the dough suddenly got sticky and started falling apart. Eff. That's when I figured it was time to let the thing rest and see if it would rise.


The dough rose, thank god, but not as much as it probably should have. And, the bread puffed up some more in the oven, so by sheer miracle I ended up with something that actually looked like it could be a loaf of bread. And, it tasted pretty good. Not quite like the brioche rolls I've eaten in restaurants, but still very buttery, egg-y, and almost cake-like in its fluffiness. Come to think of it, this would probably be mighty tasty toasted and slathered with some jam...


Not exactly an unqualified success, but at least I can probably still make some pretty tasty grilled cheeses.

Recipe can be found here, courtesy of AllRecipes.com.

One year agoThe "Ultimate" Lasagna

Monday, November 22, 2010

Apple Cinnamon Baked Doughnuts


This past weekend, in order to celebrate the fact that we now officially own our condo, Dan and I invited some friends over for a housewarming brunch. Dan was in charge of the eggs and bacon, and I tried my hand at doughnuts.


Doughnuts are usually fried, right? That's a problem, because not only do I not own a fryer, I'm also trying to watch my girlish figure so that I can properly wreck it over Thanksgiving. So, what to do, what to do. Pass on the doughnuts and serve a fruit salad instead? Nahhhh. Enter Google search for "baked doughnut recipes."

Surprisingly, there were tons of recipes online for baked doughnuts. Most of them were just made of flour, sugar, baking powder and butter -- presumably, they produced cake-y doughnuts. That's not what I was looking for. I wanted to make Krispy Kreme-esque doughnuts: light and pillowy, more sweet bread than cake, and 101 Cookbooks had a recipe that seemed to fit the bill.


I didn't have doughnut pans or cookie cutters, but it turns out that cups and shot-glasses are perfect for cutting out perfectly round doughnuts and adorable little doughnut holes. Take that, Williams-Sonoma, with your ridiculously enticing product emails...


These doughnuts turned out to be a huge pain in the ass (recipes that involve yeast always are), but were totally worth it. Super light and chewy, and oh-so-delicious dusted with cinnamon sugar. Perfect served with a dollop or two of fresh whipped cream.

Recipe for these baked doughnuts can be found here, with one slight modification: I wanted a slight apple flavor, so I substituted a 1/2 cup of the milk for about 1 cup of apple sauce. Unfortunately, the doughnuts turned out to be less apple-y than I would have liked. Next time I'm going to try using more apple sauce, or substituting apple butter or some other form of cooked apple.

Wednesday, April 21, 2010

Simple Artisanal Bread


Today is an exciting day. Why, you ask? Well, for one thing, as of 12:30 p.m. today, I am officially done with final exams (and law school) forever. But more importantly, today is the day that I get to introduce my first ever guest blogger, Brittani. 

Brittani and I met in the Vaccine Injury Clinic this year, and as we became friends, I was pleased to discover that she likes cooking as much as I do. She kindly offered to send along some of her recipes for my blog, and her first contribution is Simple Artisanal Bread. Without further ado, here is Brittani's post:

***************************************************************
Hi Everyone!

My name is Brittani, and I’m a 3L/soon-to-be alumna with Tina at GW.  Unlike Tina, however I finished with finals and everything last Tuesday, so I jumped at the chance to guest blog here while she studies away.  A few things you should know about me: (1) I love to bake, something most of my friends know, and (2) I name my kitchen tools, something most people don’t know until now.

This is my fool-proof simple artisanal bread recipe:


Please don’t mock me for buying yeast in bulk, I hate those little packets and am constantly running out of yeast.
(Editor note: I didn't even know they sold yeast in jars! What a great idea...)

Yeast that is now happy and multiplied.  
Your browser may not support display of this image.

My favorite thing about this recipe: just dump the liquids into the flour and fold it in until an ugly ball of mess forms. See the ugly ball of mess? That means stop stirring, cover with plastic wrap and walk away. If you're me and trying to speed up the process, preheat the oven to 200 while you're mixing all the ingredients, then turn it off and place your plastic covered dough into the nicely warmed oven. Then you can walk away for just 3 hours instead of 6. I don't recommend this method, but I was out of beer so I couldn't make the dough until after 12 and I wanted to be finished before midnight.


Remember when I said I like to name my kitchen tools? Well this is Moose. Why Moose? Because he's big (5 quarts) and he's the workhorse of my kitchen (frying, roasting, soups and baking).Your browser may not support display of this image. Note the shiny metal knob on his lid.  It’s really important for this recipe.  The black knob that Moose came with would melt in the oven if used in this recipe. The shiny metal knobs run about $10 at most kitchen stores and online, and are beyond worth the expense. Also now is a good time to take the batteries out of your smoke detectors, trust me on this one. 


When you finally take everything out of the oven, you have this amazing homemade bread that really doesn't take a whole lot of work, just a little bit of planning ahead of time -- it's especially easy if you make the dough in the morning and let it rise all day.

Thank you to Tina for allowing me to do this! (Editor's note: I should be thanking you!) Eventually I'll start my own blog, but for now I don't have the patience, lighting, or the camera for taking so many pictures while baking. Now, if you'll excuse me, I need to go eat all of this right now.


Simple Artisanal Bread (Adapted from America’s Test Kitchen, Almost No-Knead Bread)


Ingredients:
½ tsp. Instant Yeast
1 tsp. Sugar
7 oz. Warm Water
15 oz. + extra All-Purpose Flour
2 tsp. Salt
3 oz. Beer (pale ales work best)
1 Tbsp. White Vinegar
  1. Place the warm water in a small bowl, add the yeast and sugar, don’t stir.  Let it sit until the yeast begins to boom (approximately 5 minutes).
  2. Whisk together the flour and salt in a large bowl.
  3. Place the beer in a small bowl with the white vinegar.
  4. Once the yeast is bloomed, dump the yeast mixture, vinegar and beer into the flour, and fold in until a ugly ball forms. 
  5. Cover with plastic wrap, place in a warm place and walk away for at least 6 hours until the dough has doubled in size.   You can leave it be for as long as 12 hours.
  6. Generously, sprinkle flour over your workspace.  Dump your dough onto the workspace and knead about 10-15 times, and no more than that.
  7. Form into a ball by pulling the corners under and forming a taunt skin on top
  8. Get a sheet of parchment paper approximately 15 inches long and coat with non-stick spray and place the dough onto the parchment paper, and cover with plastic wrap again. You can keep it in a skillet pan and place it somewhere of the way for the next 2 hours.
  9. Approximately 30 minutes before the dough is done rising, preheat the oven to 500 degrees and put your dutch oven in the oven
  10. After the 2 hours is up, cut a slit across the top of the dough to allow steam to escape and sprinkle with flour. 
  11. Carefully remove the dutch oven from the oven and reduce the heat to 425 degrees.
  12. Using the parchment paper, lower the dough into the dutch oven
  13. Bake with the lid on for 30 minutes, then remove the lid and bake for additional 10-15 minutes.  If you have an instant read thermometer, it should read 210 degrees when the bread is done.
  14. Cool on a baking rack until completely cooled if you can wait that long.

Friday, April 2, 2010

Hot Cross Buns


"Hot cross buns, 
Hot cross buns,
One ha'penny,
Two ha'penny,
Hot cross buns."

Today is Good Friday. You know what that means? Hot cross buns! According to Wikipedia, in historically Christian societies, hot cross buns are traditionally eaten on Good Friday, with the cross in the middle standing as a symbol of the crucifixion of Christ. Pretty cool, huh?


I haven't worked with yeast since I made monkey bread during the Snowpocalypse.  That time I had to dissolve the yeast in warm water, but this time the recipe called for lukewarm milk. I didn't have any milk in fridge, but there was some buttermilk leftover from when I made Whoopie Pies, so I used that instead. Buttermilk isn't all that different from milk, right?


Buttermilk apparently isn't quite as much like milk as I thought. The dough just didn't come together as well -- it was much drier than it should have been, and I had to use even more buttermilk and melted butter (and a little water) to moisten it enough to hold together.


I don't know if it's because of the buttermilk, or if I just over-kneaded the dough, but the damn thing didn't rise nearly as much as it should. It was supposed to swell to twice the original size (which is exactly what happened when I made monkey bread), but it really only got about half as big as it should have.


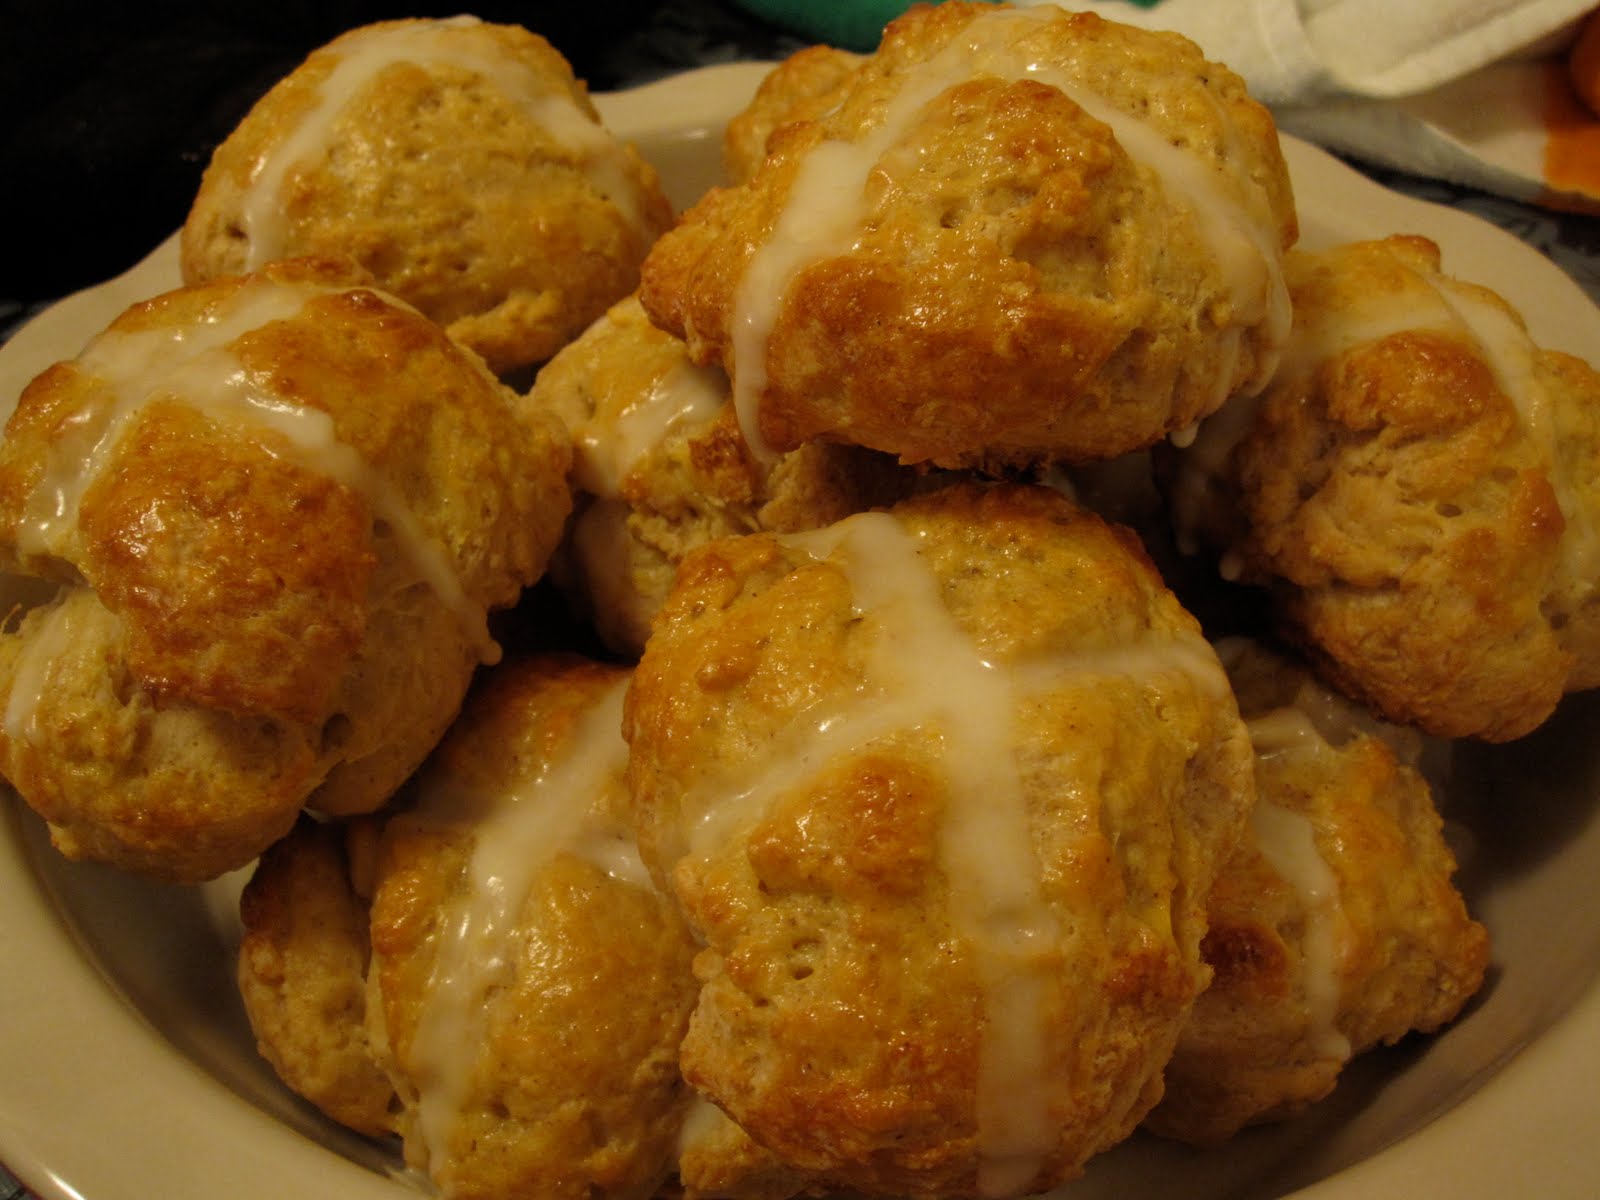
Basting hot cross buns felt a lot like basting a turkey -- you brush the balls with sauce, let them marinate for a while, makes some slits, then juice 'em up some more. The glaze also called for milk, but as none had magically appeared in my fridge in the last hour or so, I substituted it with heavy whipping cream instead. 


These buns were crustier than I expected, and not as sweet. They were almost scone-like in consistency. Not sure if that's how they're supposed to be, but I think they still turned out pretty well considering all the experimenting I did with the recipe. They smell wonderfully cinnamon-y, and the icing adds just the right amount of sweetness to the buns.


The recipe can be found here at the Joy of Baking's website.

Tuesday, February 9, 2010

Ooey Gooey Monkey Bread


With the Snowpocalypse shutting down the city (and law school!) for the third day running, I was stuck in my apartment with nothing to do.  The snow-covered trees and buildings outside reminded me of frosting, and I just happened to have sugar, flour, butter and cream cheese, so . . . obviously I had to make Monkey Bread!


This was my first time working with yeast -- usually I make this recipe with Pillsbury biscuit dough. But I happened to have some packets of dry active yeast in my cabinets and way too much time on my hands, so I was feeling pretty ambitious. Monkey bread from scratch, baby!


Isn't it amazing how just a little warm water, yeast, sugar and flour can come together and create something as awesome as dough?  The recipe said to let the dough rise for 2-3 hours in a warm place, so I stuck it in the oven (unheated, of course) and ran off to the gym. By the time I came back the dough had risen to epic proportions, and was slightly crusty on top (which worried me a little), but most of it was moist and yeasty, so I plopped the sucker on my table and and started kneading.  


The crusty parts blended with the rest of the dough without a hitch, and the rest of the recipe followed smoothly. Roll out little balls of dough, dip in butter, cover in cinnamon sugar, plop into cake pan.  Then drizzle the stacked layers with brown sugar butter sauce, pop the whole thing into the oven, and wait for your apartment to fill with the mouthwatering scent of cinnamon rolls (which, if you think about it, is more or less what Monkey Bread is).


The end-product is pull-apart soft, buttery, cinnamon-y, and oh so yummy. The brown sugar/butter mixture drizzled on top caramelizes during the baking process, and forms a delightful crust.  Unlike a regular cinnamon roll, this monkey bread is moist and soft on the inside, but sweetly crispy on the outside.  Drizzle some cream cheese frosting on top, and you'll think you're in heaven.


Ooey Gooey Monkey Bread (Adapted from the Cooks.com recipe)

Ingredients:
2 cups milk
1/3 cup granulated sugar
1/2 cup shortening
1/4 cup warm water
1 pkg active dry yeast
4 cups flour
1/2 tsp baking soda
1/2 tsp baking powder
2 tsp salt
2-1/2 sticks butter, melted

1 cup packed brown sugar
1/2 cup white sugar
2 tbsp ground cinnamon 

Steps:
(1) Dissolve yeast in warm water with a pinch of sugar. Let it sit for 5 minutes.

(2) In a pot, heat milk until tiny bubbles begin to form around the edges of the pot. Remove from heat, and pour into a medium sized bowl.

(3) Stir shortening and 1/3 cup granulated sugar into milk until dissolved.

(4) Cool milk mixture until lukewarm, then stir in yeast mixture + 3 cups flour.

(5) Transfer dough to a large bowl brushed with oil. Turn dough once to coat entire surface with oil.  Cover and let rise in a warm place for 2 to 3 hours.

(6) Add baking soda/powder, salt, and remaining 1 cup of flour. Knead 4-5 minutes on floured surface. Return kneaded dough to bowl and let rise for another hour. (Although, I only let it rise for another 40 minutes, and it turned out fine.)

(7) While you're waiting for the dough to rise, preheat the oven and prepare two separate bowls. One for 1 stick of melted butter, the other for a mixture of the cinnamon and 1/2 cup granulated sugar.

(8) Roll dough into 1-1/2 to 2 inch diameter balls. Dip the balls into the melted butter, then roll it around in the cinnamon sugar. Line and stack finished balls in greased cake pan (see pictures). Set aside.

(9) Melt remaining 1-1/2 sticks of butter in a pot with brown sugar on medium heat. Stir until mixture is thick and smooth. Remove from heat and drizzle it over the dough balls in the cake pan.

(10) Bake the monkey bread for about 45 minutes.  Cool 5 minutes, then smear with cream cheese frosting. (Use whatever recipe you like, but I usually mix 1 stick butter, 8oz cream cheese, and powdered sugar to taste.)

The bread can be eaten sliced or pulled apart by hand.  Best served while still warm and gooey from the oven!