Showing posts with label Italian. Show all posts

Tuesday, September 13, 2011

Pepperoni Pizza Puffs


First Patriots game of the season was last night, and Dan was giddy with excitement. Me? Not so much. As dreamy as Tom Brady is, my favorite part of watching football is the eating. Chips and dips...wings...pizza. Mmm, junk food!

I saw this recipe for pizza puffs on FoodGawker and knew right away that I was going to have to make them. The ingredients were all things I had laying around, the prep/cook time was short, and the recipe just looked/sounded really tasty. 


These puffs are seriously delightful, guys. They taste exactly like pizza, but fluffier. And, because they're bite-sized, they're extra easy to eat. You pop one in your mouth, chew, savor the deliciously cheesy flavor, and the next thing you know the whole plate is gone. Definitely a great addition to the list of appetizers/snacks that will help get me through football season.

Pepperoni Pizza Puffs (Adapted from the Kirbie's Cravings recipe)

Ingredients:
- 3/4 cup flour
- 3/4 cup milk
- 1 tsp baking powder
- 1 cup shredded cheese (I used Parmesan and Colby Jack)
- 1 large egg
- 1/2 cup green onions, chopped
- 1/3 cup pepperoni, chopped/diced
- Salt/pepper to taste
- Italian seasoning

Steps:
(1) Preheat oven to 400, and grease a mini-muffin pan.
(2) In a large bowl, mix everything but the Italian seasoning.
** You should get a batter that's slightly less thick than pancake batter.
(3) Scoop batter into the cups of the mini-muffin pan, about 2/3 full. Sprinkle some Italian seasoning on top of the batter in each cup.
(4) Bake 10-12 minutes.
(5) Serve warm with a side of marinara or pasta sauce.

For other great recipe ideas, click here.

Saturday, August 27, 2011

Meatball Sub


Looks like Hurricane Irene is the new Snowpocalypse -- everything is closed, traffic has ground to a halt, and everyone is holed up in their homes. The only difference, I guess, is that we're actually prepared to battle the forces of nature this time around.  Maybe a little too prepared. BJ's was a mad house yesterday! I was just there to get some snacks, but it seemed like everyone else was stocking up on enough bottled water and dry foods to survive the Apocalypse. I almost caved in to the peer pressure and got some water myself, but I was on foot and couldn't possibly carry all that back home. Besides, the storm is only supposed to last a day or two, and I've got a full Brita, orange juice, Gatorade, and lots of soda.


Anyway, with the storm a' brewin' outside, all my weekend plans have been canceled, so there's nothing left for me to do but watch the Ghost Whisperer marathon on WeTV, terrorize the cats, and cook. The TV is on, my cats are currently in hiding, and it's just about time for dinner. Dan hasn't had much of an appetite lately, so I really want to make something yummy to tempt him into eating a full meal. Seems like kind of a perfect time to make some homemade meatball subs. What could be tastier than warm, crusty bread, gooey cheese, and juicy meatballs smothered in savory red sauce? Nothing at all, especially in this weather.

Hope you guys are having as much fun during the hurricane as I am!  In the meantime, stay dry, be safe, and I'll see everyone on Monday when this all blows over.

Meatball Sub

Ingredients:
- 1 lb beef
- 2 tbsp onion powder
- 1-1/2 tbsp salt (more if you like your food salty)
- 1 cup Italian-style bread crumbs
- 1 egg
- 1 container tomato sauce (I used Prego)

Steps:
(1) Preheat oven to 325.
(2) In a large bowl, combine all ingredients until well-mixed. The meat should be very malleable, and not sticky.
(3) Roll meat mixture into balls, 1-inch in diameter. Place balls on a greased pan. Don't crowd the pan, but you don't have to worry about these meatballs spreading, so you can line them closer than you would if you were working with cookie dough.
(4) Bake meatballs for about 8 minutes.
(5) While meatballs are baking, start heating the pasta sauce in a large sauce pan.
(6) Take the meatballs out of the oven and scoop them into the bubbling sauce. Leave the oven on.
(7) Cook meatballs in sauce for about 3 minutes. Turn stove off.
(8) Cut a 6-7 inch wedge off the end of a loaf of French bread. Slice length-wise without severing the loaf all the way in half.
(9) Line the bottom half with provolone cheese. Scoop about 4-5 meatballs into the middle, and top with more provolone.
(10) Place your sandwich onto a baking sheet and slide back in the oven. Bake for about 1 minute, or until the cheese is melted. Sprinkle with chopped or dried parsley.
(11) Eat immediately, with a lot of napkins on hand.

For other great recipes, click here, here or here.

Jam Hands

Saturday, June 4, 2011

Limoncello


OK, so the thing about summer is that it's so frickin' hot that I never really have any motivation to cook anything. Who wants to stand in front of a hot stove/oven when it's 95 and humid? I mean, yes, I have A/C, but just knowing that the air outside is thick enough to swim through really takes away a person's appetite. So lately all I really want to do after work is sit on my couch, in my air conditioned apartment, and suck down an endless stream of cold beverages. Frozen margaritas, rum punch, lemonade, daiquiris, agua frescas...etc etc. 


After a string of recent posts on summer beverages, my friend Karen accused me of getting lazy with my blog. How rude! I obviously did that one post about stuffed burgers two weeks ago, and then there was the mille feuille post last weekend...and before that there was the...uh...Ok fine. I've been making a lot of drinks lately. Like I said, it's hot, and all I want to do is drink stuff. Whatever.

And this limoncello recipe wasn't a total walk in the park. I had to peel eight lemons. Eight! By hand. Without a vegetable peeler. Have you ever tried peeling a lemon with a butcher knife? Not easy, especially when you have to manually remove the pith from the peel too. Phew. Talk about cramped hands.


But aside from the lemon-peeling, this limoncello really wasn't too hard to make. It was more a matter of patience, since the peels have to be soaked in vodka for four whole days, and then once simple syrup is added the mixture needs to sit overnight before it's strained. After that, the stuff still has to chill for a couple hours before it's served. I am not a patient person, so I skipped the last two steps. I let the lemon-infused vodka and syrup marinate for about an hour and a half before I decided I just had to have a taste. 

Whew, this stuff is much stronger than I expected. I don't know why I thought it would be less strong -- it's just vodka and sugar water, after all. Very tasty though -- sweet and lemony and refreshing. But, probably would be better served chilled, as intended.

Recipe can be found here, courtesy of the Food Network's Giada De Laurentiis.

Friday, April 8, 2011

Kale and Lemon-Pepper Chicken Pizza

(I got a new camera! Can you tell?)

Both the Pioneer Woman and the Crumbly Cookie assured me that their favorite pizza dough is at its best the longer it's kept in the fridge, so I took their advice and let the second half of my dough chill for a few days. I didn't have the patience to wait 3-4 days, but I figured that two days was plenty, so I pulled the dough out of the fridge today for another round of pizzas.


Now that I know what kale is, I'm eager to work it into my vegetable rotation. I bought a big bag of it at BJs the other day, but have been kind of at a loss as to what to do with it. I mean, I ate it bunch when I was younger, but I'm pretty sure my parents just sauteed it and served it with rice. Sauteed kale is delicious, of course, but there's gotta be more you can do with it, right? Toss it onto a pizza with chunks of tangy, savory lemon-pepper chicken, for instance?

Man, when I tell you this pizza was delicious...you really need to take my word for it. The dough, which had become even more malleable with a few extra days in the fridge, was perfectly tender and chewy, and had a smoother and more uniform consistency/texture than my last batch. The saltiness of the sauteed kale complemented the tangy-peppery-ness of the chicken, and in the absence of sauce, the gooey melted mozzarella was the deliciously fatty glue that held it all together. Nom nom nom!


Kale and Lemon-Pepper Chicken Pizza 

Ingredients: (makes 3 personal pizzas)
- 1/2 of the pizza dough from the Pioneer Woman's recipe
- 3 tsp olive oil + more for greasing baking pans
- 2 cups kale, chopped
- 2 cups shredded mozzarella cheese
- 1 chicken breast
- 1/4 cup lemon juice
- Salt/pepper to taste

Steps:
(1) Preheat oven to 500.
(2) Grease two baking pans with olive oil, making sure entire surface is coated in oil.
(3) In a pan, cook kale on medium-high heat with a dash of salt until leaves are just wilted. Set aside.
(4) Cut chicken breast into strips, and season each side with salt and lots of pepper. Soak chicken strips in the lemon juice for about 10 minutes. Cut into bite size pieces, then set aside and start prepping the pizza dough.
(5) Cut dough into 3 pieces. Take one piece of dough, lightly flour both sides, and then stretch and smooth into the desired shape/thinness. Do this with all three pieces. Please stretched dough into baking pans. (I used a 13x9 cake pan + 9x9 square pan)
(6) Spread 1 tsp on the surface of each pizza.
(7) Divide 1 cup mozzarella between 3 pizzas.
(8) Divide cooked kale and chicken bits between 3 pizzas, spreading them evenly on top of the mozzarella.
(9) Sprinkle remaining cup of mozzarella between 3 pizzas, on top of the chicken/kale mixture.
(10) Bake for 8 minutes, or until cheese is bubbly.

One year ago: Blueberry Cheesecake Bars

Thursday, April 7, 2011

Pepperoni Pizza


Mmm, pizza. Pizza pizza pizza. Is there anyone in the world who doesn't love pizza? Show me a person who says they don't like pizza, and I'll show you a liar. I mean, what's not to love about it? Tender (or crispy, or chewy) crust...tangy or creamy sauce...gooey melted cheese...and any yummy topping you could possibly want or think of...Is it any wonder that "Pizza Day" is basically every single kid's favorite day in the lunchroom?

Dan and I are very loyal Domino's customers (Pizza Hut has better wings, though), but I've been dying to make my own pizza for a while now. The Crumbly Cookie blog had a few tasty-looking posts about homemade pizza last year, and they've been sitting in my queue of bookmarked "must try" recipes since. But, with my repeated failed attempts at handling yeast, I had no confidence in my ability to make pizza dough, so I put off doing it, rationalizing that I couldn't make pizza properly anyway since, hey, no pizza stone. Then, this past weekend my stunning success making focaccia gave me a huge boost of confidence, and I figured, hell, let's try pizza!

(Yuck, this pizza did NOT photograph well...tasty though!)

I've been  really into the Pioneer Woman lately, so I actually went with her pizza recipe instead of Crumbly Cookie's, although as far as I could tell, their recipes were substantially similar if not identical. Yeast, flour, and salt mixed together, followed by a slow, cold rise in the fridge over night. My luck with yeast held, and the dough was wonderful. After many hours in the fridge it was more stretchy than sticky, despite not having as much flour as you'd expect, and it was easy to pull and stretch it into the shape and thinness I wanted. Awesome!

For the sauce, I cheated and went with store-bought Ragu. What can I say, I was feeling lazy, I didn't have crushed tomatoes or tomato paste, and Ragu is perfectly good pizza sauce in a pinch! Anyway. After saucing the dough, I loaded it down with shredded mozzarella, colby jack, parmesan, and pepperoni slices. 10 minutes at 500 degrees later, Dan and I were sitting down to a very delicious, cheesy, tender-crusted homemade pepperoni pizza. A very satisfying dinner, with plenty leftover for Dan's lunch. I still have enough dough for another pizza, so...keep your eyes peeled for another pizza post soon,  probably with white sauce and lots of vegetables.

Recipe can be found here, courtesy of The Pioneer Woman.

Sunday, April 3, 2011

Homemade Pasta with Mushroom Cream Sauce


I've been on kind of a cook/bake/serve-ware binge lately. In the last 3 weeks I've purchased a set of 12 stemless wine glasses, a matching 90oz pitcher, a crust cutter, a cupcake corer (you know, for all those cupcakes that need stuffing), and a pasta machine. The wine glasses/pitcher haven't arrived yet, the pasta machine spent most of last week acting as a dead weight to smooth out my new rug, and I haven't gotten any use out of either the crust cutter or cupcake corer, since I've vowed to make fewer desserts. Before you start to think that all my purchases were a big waste of money though (they're not, honey), let me just say that I finally broke in the pasta machine last night, and it was great.  

(My friend Amy has long, slim arms that deserve to be photographed.)

So yesterday, Dan and I took some friends to a local vineyard for a wine tasting. We sampled eight delicious wines, then purchased a nice bottle of white (a 2009 Sommet Blanc) to help wash down the obscene amount of cheese we had brought with us.  When we finally made it home, stuffed to the gills, we realized that there were still two large pitchers of sangria to be addressed, as well as a freshly baked loaf of focaccia. The most logical thing to do, of course, was to drink all the sangria, eat all the bread, and make a huge batch of fresh pasta to round out the meal. Enter: Tina's new pasta machine.


As it turns out, pasta dough is just eggs + flour. Did you know that? I didn't. I thought for sure it was going to involve a lot more fancy wheeling and dealing, and possibly lots of butter. The whole process was very straightforward, though, and the only issue we had was getting the dough to the right consistency and remembering to let it to rest before rolling it out. Our first batch, which was under-floured, looked fine but turned out to be kind sticky, and stuck stubbornly to the cogs of the pasta machine. The second batch, which we kneaded with a lot more flour and allowed to rest for a bit before rolling, turned out much better -- the texture was smoother, and the strands came apart cleanly. 

When it came time to cook the pasta, there was a bit of confusion about cooking time. We knew homemade pasta was supposed to cook a lot faster than the dried commercial stuff, but cooked pasta doesn't look a whole lot different than its raw form, so there was a lot of guesswork involved. We ended up just boiling each batch for about 3 minutes, and the noodles came out kind of al dente. Personally, I prefer my pasta to be softer, but everyone else seemed to be fine with the texture and consistency, and I'm told Italians like their pasta al dente, so what do I know?


So, the verdict -- homemade pasta is delicious, but really labor intensive. Far too labor intensive to be a regular feature in my kitchen. I mean, it took me longer to mix/knead/roll/cut/boil one batch of pasta than it did to bake a loaf of focaccia, even taking into account the 60+ minutes of dead time to proof the yeast and allow the bread dough to rise. I'm not made of time, you know. Still, fresh pasta is admittedly very tasty, and I could see myself making it every now and then as a treat. Plus, I gotta get my money's worth out of that damned machine.

For a straightforward pasta recipe, check here, courtesy of The Pioneer Woman.

Saturday, April 2, 2011

Focaccia


OK, can we all take a moment to reflect on the fact that I successfully handled yeast today with 100% success? For the first time in almost a year full of botched bread-making attempts, everything that was supposed to happen, happened. The yeast foamed; the dough came together and then rose beautifully; and the bread baked into a fragrant, golden loaf of awesomeness that filled the kitchen with its delectable, onion-y, garlicky, rosemary-y scent. At the risk of being repetitive...awesome.


For once, I have no back story to explain my motives for making this recipe. I just love focaccia. I mean, I've never met a loaf of bread I didn't like, but focaccia is my absolute favorite. It's so chewy and flavorful, and perfect before or during any meal. It's wonderful when eaten plain, smeared with roasted garlic, dipped in olive oil, or made into a sandwich. And, it can be made with any toppings you like. No bread has ever been so versatile, or so delicious.


For a wonderful recipe, check this one out, courtesy of Tyler Florence and the Food Network.
** Recipe note: The recipe calls for 3.5 to 4 cups flour, but I only used around 2.5. For whatever reason, that was all it took for my dough to come together. I would suggest that as soon as your dough becomes smooth, pliable and non-sticky, stop adding flour, no matter what the recipe says.

One year ago: Hot Cross Buns

Monday, February 21, 2011

Tiramisu


So last week one of my interns told me that if I could successfully make tiramisu and post about it, his wife would officially start following/reading my blog. Well! I'm never one to turn down new readership, so....challenge accepted.


If I had known how difficult it would be to track down all the ingredients for tiramisu, I probably wouldn't have been quite so enthusiastic about accepting the challenge. I had to hit up to two different Safeways before I managed to get my hands on marscapone cheese, and then neither store had ladyfingers. In fact, none of the store employees had even heard of ladyfingers. "Lady Bingers?" one guy repeated in confusion. "No. Lady FINGERS. They're cookies that look like fingers? No? Nevermind." In the end, I had to just make my own. Oy.


So...espresso is basically just really strong coffee, right? I didn't have a fancy espresso maker, but I did have an electric drip coffee brewer. I also had a giant tub of Folgers coffee grounds from BJs, but I didn't think that would taste very good in a dessert, so I bought some espresso grounds and hoped that would make a difference. The espresso certainly smelled significantly better than the Folgers. And then when a splash of rum got thrown in the mix...yum! No wonder everyone likes tiramisu.


Aside from the grocery store debacle, tiramisu-making proceeded smoothly for the most part until the very end. Then, as I began building the cake layers, I realized that (1) I had made too few ladyfingers, so the tiramisu was going to be significantly more cream than cookie; and (2) the baking dish I was using was too long and shallow, so the whole thing was going to be a lot flatter than those gloriously thick cakes you get at Italian restaurants. Bummer! Still, it was too late at that point to change anything, so I just barreled onwards and hoped that even if my tiramisu didn't look great, it would at least taste good.


And it did! Shockingly good, in fact. 12 hours in the fridge had firmed the cream up to the perfect consistency, and while there was very little sugar in both the ladyfingers and marscapone cream, the whole concoction was pleasantly sweet, with distinct notes of coffee and rum. Mmm, rum. My tiramisu was definitely rummier than the usual restaurant version, but the stronger boozy flavor was not at all off-putting. Delicious! Are you reading yet, Heather? :)

Recipe can be found here, courtesy of the Barefoot Contessa.

Thursday, December 2, 2010

Baked Italian-Style Breaded Pork Chops


There is way too much food in our freezer. We've got a billion packets of bacon, tubs of uneaten ice cream, endless gallon bags stuffed with steaks, chicken breasts, pork chops, salmon filets and tilapia. I think there might even be a container of scallops somewhere in the back. Why? Because we live a block from BJ's, and I just can't help myself. 

So, I've been cooking frantically this week in a effort to open up some space in the freezer. I used up the frozen shrimp for carbonara on Monday, chicken for my lunch salad on Tuesday, and grilled steak for dinner last night. In an effort to keep things exciting in the kitchen, I decided to make pork chops tonight.


We've already had glazed, grilled chops two or three times in the last few months, and I felt it was time for a change. Closet Cooking was no help this time, because all of his recipes were a little more involved than I felt like dealing with at 7 o'clock on a Thursday night, and they called for a slew of ingredients I didn't have on hand. Plus, I was tired of using the electric grill for our dinner meats. Lucky for us, I had all ingredients to make breaded, baked pork chops.


This wasn't exactly a Rachel Ray-esque 30-minute meal, but the pork chops were very straightforward and easy to make. Both chops were seasoned, breaded, and browned in no time at all, and while they were baking in the oven, I had time to whip up a make-shift version of creamy au gratin potatoes, and sit down with a former DEA agent to answer a few quick back-ground investigation questions for Emily's new job. What can I say, I'm a multi-tasker.


I think I prefer the savory, caramelized crust on my glazed grilled pork chops better than the Italian-style breading of these chops, but overall I would rate this dish as "tasty." The meat was tender and juicy, and very flavorful. I'm glad I decided to salt/pepper the chops directly pre-breading though, because I think without that seasoning they would have just been bland and greasy.

Baked Italian-Style Breaded Pork Chops (Adapted from AllRecipes.com's Italian Breaded Pork Chops recipe)

Ingredients:
- 1 egg, lightly beaten
- 1 tbsp milk
- 2/3 cup Italian seasoned bread crumbs
- 1/3 cup grated Parmesan 
- 2 tbsp dried oregano
- 1 tbsp olive oil
- 2 cloves garlic, minced
- 2 pork chops

Steps:
(1) Preheat oven to 325.
(2) In a small bowl, beat together the egg and milk. In a separate small bowl, mix the bread crumbs, Parmesan, and oregano.
(3) Heat the olive oil in a large, oven-proof skillet over medium heat. Stir in the garlic, cook until brown.
(4) Dip each pork chop in the egg mixture, then the bread crumb mixture. Make sure each chop is evenly coated.
(5) Cook the chops on the skillet until lightly brown on each side. 
(6) Place the skillet/chops into the oven. Cook for 25 minutes.

Tuesday, November 30, 2010

Shrimp Carbonara


Dan was feeling under the weather today and had to leave work early. What does one feed to a sick person? Ginger ale and soda crackers? How boring! And so sad. I figured something heartier would perk his immune system up faster. 


I've been reading Closet Cooking a lot lately, and the guy loves his shrimp. He's got recipes for Thai Lemon Shrimp, Shrimp Scampi, Shrimp Po' Boys...just to name a few. He also had a great recipe for Shrimp Carbonara, and I just happened to have all the ingredients to make it. Shrimp has a lot of protein in it, right? And I'm pretty sure I read somewhere that carbohydrates do a body good.


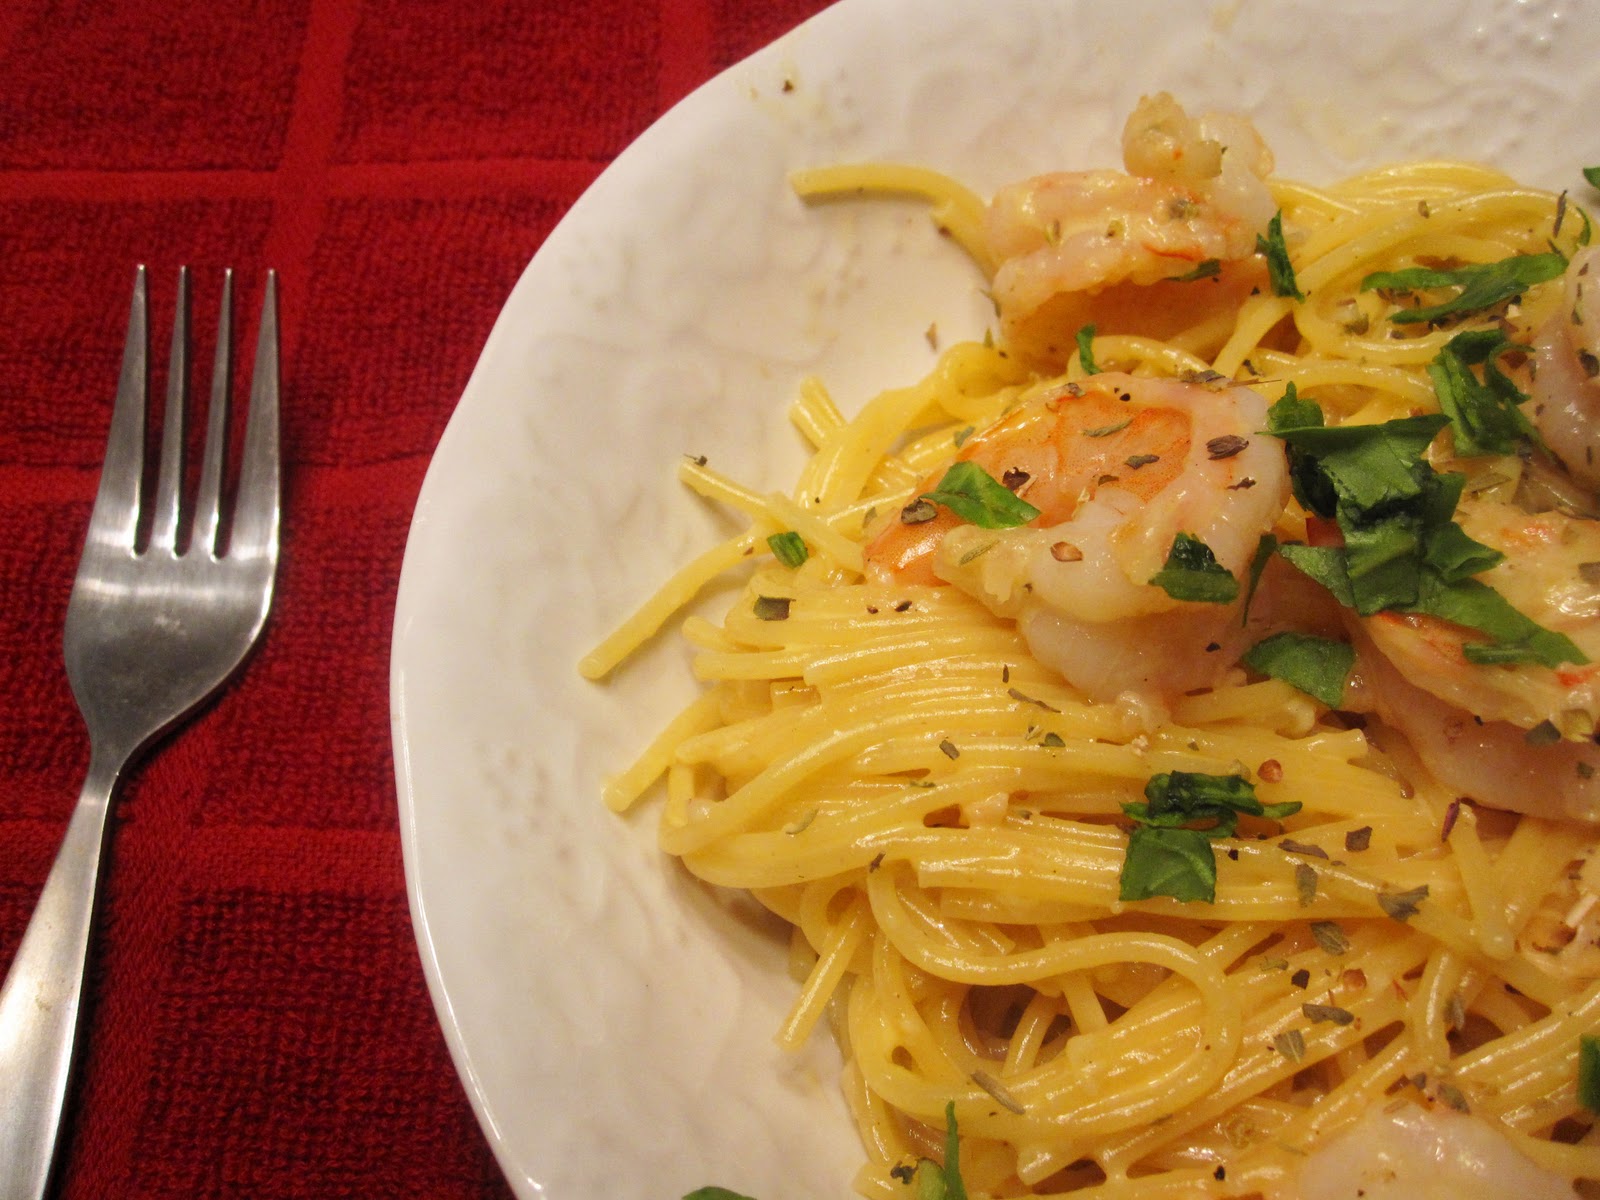
The dish came together super quickly and was amazingly delicious. The shrimp was plump and tender, and while I didn't have any linguine, spaghetti worked wonderfully with the creamy, cheesy sauce. Dan gobbled down a heaping bowlful before crawling back onto the couch for a nap. He's looking better already!

Shrimp Carbonara (Adapted from Closet Cooking's Recipe)

Ingredients:
- 1/2 box of linguine (or spaghetti)
- 4 slices bacon
- 1 lb shrimp, peeled/de-veined
- 1 clove garlic, chopped
- 1 egg yolk
- 2 tbsp heavy cream
- 1 cup grated Parmesan
- 1 tbsp parsley, chopped

Steps:
(1) Start cooking the pasta.
(2) In a medium-sized pan, cook the bacon. Set bacon aside and get rid of all but 1 tbsp of the bacon grease.
(3) Add shrimp and garlic to the bacon pan, saute until just cooked.
(4) In a separate bowl, mix yolk, parmesan, and heavy cream. Season with salt/pepper to taste.
(5) Drain pasta, then add it to the pan. Toss until shrimp and pasta are well-combined.
(6) When sizzling sounds stop, pour egg/cheese mixture into the pan. Toss until pasta is well-coated.
(7) Serve with parsley sprinkled on top.

Tuesday, November 16, 2010

Skillet Chicken Parmesan


Lately Dan and I have been eating a lot of mozzarella sticks, leftover takeout, and cold pizza. My mom's birthday lunch kind of burned me out on the cooking front, and I haven't been able to muster the energy to whip up anything blog-worthy. There were the glazed, grilled pork chops last Friday, but...I was hungry and didn't remember to take pictures until the chops were a mere grease smear on our plates. Alas.


Not that Dan ever complains about what I put into his stomach or anything, but I was feeling a little guilty last night after work. There was a time -- not so long ago, really -- when I painstakingly planned our dinners hours in advance and eagerly looked forward to putting home-cooked meals on the table every night. That lasted...2 weeks, I think. How did I get so lazy so quickly? Anyway, I was bound and determined to whip up something delicious last night, but it was late-ish, and neither of us could wait long enough for anything really involved. So, what is quick and delicious and filling? Skillet chicken parmesan.


Because we ran out of eggs this weekend, and I only had panko breadcrumbs, I was originally just going to pan fry some chicken breasts, smother them in sauce and throw the whole thing into the oven for a while. Who says chicken in chicken parmesan has to be breaded? Imagine my delight when I discovered a canister of Italian-style breadcrumbs in the pantry and half a container of heavy cream in the fridge! In case you were wondering, cream with a dash of salt/pepper works just as well as eggs + milk when it comes to breading chicken.


This turned out to be one of the yummiest meals we've eaten in a while (although, note to self: brown the chicken longer to crisp it up more), and it took only 30 minutes from start to finish. Eat your heart out, Rachel Ray!

Skillet Chicken Parmesan

Ingredients:
- 2 boneless, skinless chicken breasts
- 1/3 cup Italian-style breadcrumbs
- 1/3 cup grated Parmesan cheese
- 1/3 cup heavy cream
- 1 jar pasta sauce
- 1 tsp minced garlic
- Salt
- Pepper

Steps:
(1) Sprinkle chicken breasts with salt and pepper.
(2) In small bowl, season cream with salt/pepper to taste. 
(3) In separate bowl, mix breadcrumbs and grated Parmesan.
(4) Dip chicken breasts into the cream, then dredge in breadcrumbs.
(5) Cook chicken breasts on a skillet over medium heat with the minced garlic until lightly brown. Turn once to brown both sides.
(6) Pour pasta sauce over breasts. Place cover on skillet and let everything cook for 15-20 minutes.
(7) Serve with pasta, salad, and garlic bread. Pile on the grated Parmesan!

Monday, November 1, 2010

Stuffed Pasta Shells


Man, it's been a while since my last post! It's not that I haven't been cooking -- I have, I swear. Pork chops, stuffed chicken breasts, soy-glazed salmon, etc. I just haven't been able to find time to take pictures/blog about it. I started my clerkship back in September, and then Dan and I moved into our new condo -- between commuting to/from work, buying a car, furnishing the condo, and getting lost in our new neighborhood on almost a daily basis, I barely have the energy to wolf down my dinner before it's time to fall into bed.


We also adopted a kitten, so a lot of our time in the evenings is spent trying to buy her love with food and belly rubs. She's definitely getting a little spoiled by all the attention. Her new favorite activity is jumping into bed with us way too early in the morning and making a nuisance of herself until one of us surrenders and gets up to feed her. Just this morning I was woken up by the little fur ball at 5:30am -- come to think of it, maybe this is why I've been too tired in the evenings to cook/take pictures/blog.


Today was the first day in a long time that I had a chance to cook at a leisurely pace. Emily and Smriti came over to see the new place and meet my kitty, and I decided to feed them too.


The pasta shells were stuffed and baked in less than an hour, smothered in cream sauce, and heartily enjoyed with garlic bread and glasses of wine. Delicious! (And even better cold the next day)

Stuffed Pasta Shells: (From...Food Network, I think)

Ingredients:
- 12 jumbo pasta shells

(Filling)
- 2-1/2 cups ricotta
- 1/2 cup grated Parmesan
- 1 tbsp olive oil
- 2 cloves garlic, minced
- 2 cups spinach
- 2 cups chopped cooked chicken (I used mushrooms this time)
- 1/2 tsp salt
- 1/4 tsp ground black pepper.

(Sauce)
- 4 tbsp butter
- 1 clove garlic, inced
- 2 tbsp flour
- 2 cups heavy cream
- 1/2 cup milk
- 3 tbsp chopped chives or green onions
- 1 cup grated Parmesan
- 1 cup chopped tomatoes

Steps:
(1) Preheat oven to 350.
(2) Butter 9x13 glass baking dish. Set aside.
(3) Boil medium pot of water. Add pasta shells and cook for about 9 minutes until al dente. Drain and rinse. Set aside.
(4) In large bowl, mix ricotta and Parmesan.
(5) In medium skillet over medium heat, add garlic, spinach, and mushrooms. Stir until spinach is wilted and mushrooms are soft. Remove from heat and let cool for 10 minutes.
(6) Add spinach/mushroom mixture to cheese mixture. Combine well.
(7) Stuff each shell with a heaping spoonful of the filling and line them up in the baking dish.
(8) For the sauce, heat the butter in a sauce. Add garlic and flour, whisk until smooth. Gradually add cream and milk. Whisk until mixture begins to thicken and bubble. Remove from heat and add chives, 1 cup Parmesan, and tomatoes. Pour over shells.
(9) Bake for 30 minutes.

Tuesday, April 27, 2010

Spinach & Mushroom Fettuccine Alfredo


Why is the weather in New England so crappy? I've been in Massachusetts for almost two days already, and I have yet to experience anything but ominous-looking clouds, wind, and rain. The only upside to this crappy weather is that it gives me an excuse to cook creamy, rich, hot comfort food that would be way too heavy on a warm day.


Dan and I weren't feeling up to dealing with raw meat today, and he hates grocery shopping with me (I get too excited by all the food possibilities, apparently), so we stuck to the produce aisle for dinner. Spinach and mushrooms are a timeless combo, and great in cream-based sauces.


"Don't crowd the mushrooms!" OK, Julia. I didn't crowd the mushrooms -- at least, not as much as I usually do. And you know what? They cooked faster!


I forgot how much spinach wilts. I started out with a big ol' pile of leaves, and in seconds they had cooked down to a mere mouthful. Luckily spinach is both healthy and delicious, so I didn't think twice about tossing in a few extra handfuls.


Alfredo sauce stresses me out. I'm not a patient person, and it always feels like takes so long for the cream to thicken up, no matter how much I whisk. But shredded Parmesan cheese and a few teaspoons of flour do wonders, and by the time the everything is bubbling, the sauce is just perfect.


The afredo was hot and creamy and satisfying -- perfect for a cold spring day in Massachusetts.


Spinach & Mushroom Alfredo (Adapted from Cooks.com recipe)

Ingredients:
- 3 cups spinach
- 2 cups mushrooms
- 2 cloves garlic, chopped
- 3 tbsp butter
- 2 cups cream
- 1-1/2 grated Parmesan cheese
- 3 tsp flour
- Pinch of salt
- 1/2 box fettuccine noodles

Steps:
(1) Bring 4 quarts water to a boil. Cook fettuccine until soft, stirring constantly to make sure the noodles don't stick. Add pinch of salt. Drain and set aside.
(2) Melt butter in a skillet. Saute garlic in the skillet on medium heat for about a minute.
(3) Add mushrooms to skillet, making sure to spread them out evenly. Cook until soft and brown.
(4) Add spinach, cook until wilted.
(5) Pour cream into skillet, whisking constantly until it begins to thicken.
(6) Add Parmesan and flour. Keep whisking for about three minutes. Add salt to taste.
(7) Take off heat. Add noodles, combining until each noodle is well-coated with sauce.
(8) Serve while hot.

Thursday, March 25, 2010

The "Ultimate" Lasagna


I cook so much more when Dan comes to visit me. (He's getting his masters in Boston while I finish up law school in DC). Most of the time I eat sandwiches or salads for lunch, and when dinner rolls around I just throw some taquitos in the microwave and call it a day. It's just too much effort to cook for one person, you know? But I still like to read food blogs everyday and bookmark interesting recipes for later. This means that by the time Dan comes down, I'm bursting with energy to try all the recipes I've stockpiled in the intervening month. The most recent visit's project = lasagna.

(Oh hello!)


This is a Tyler Florence recipe, and boy does it live up to its "ultimate" moniker. There is so much stuff in there! 2 lbs of noodles, 2 lbs each of ground beef and ground sausage, 1 lb of mozzarella, 2 quarts of ricotta, etc etc. I was in a bit of a time crunch, so I actually left out a lot of the ingredients to save cooking time. Even so the resulting lasagna was epic in its massiveness.


Lasagnas are way more involved than I envisioned. There are so many alternating layers! But doesn't that look delicious? 


I was a little confused by the wording of the directions for this recipe. The top layer was supposed to just be ricotta cheese, sauce, and mozzarella cheese, but for some reason I thought that there should also be another layer of noodles on top of everything to close out the dish. I was mistaken. The noodles on top dried out in the oven and were hard and chewy, even with some extra cheese sprinkled over it. Next time I'm definitely leaving off the extra noodle layer.


Tyler claims that this recipe feeds 8 -- this is a lie. I swear the lasagna actually rose like yeast in the oven. I would estimate that there is actually enough food to feed 15 hungry people, and I cut out nearly 50% of the ingredients! I will definitely be eating leftovers for a while.


The recipe can be found here on the Food Network's website.