Showing posts with label Semi-Homemade. Show all posts

Thursday, September 1, 2011

Spinach and Mushroom Quiche


My friend Mark came over for lunch yesterday. He's a fantastic cook. During law school he was constantly whipping up delicious treats in his kitchen and bringing them to class. You'd think all that cooking would be a distraction during school, but he was also acing all his classes, teaching legal research and writing to bright young minds, and moonlighting as the Editor-in-Chief of the Law Review Journal. Don't you hate people who are good at everything?


Anyway, after drooling over his baked goods for the last three years, I've been dying to cook with Mark. So, when he came over, I roped him into helping me make a quiche. In no time at all, we were rolling out our store-bought pie crust, cooking/chopping fresh spinach, sauteing mushrooms, and whipping up the creamy base for the quiche filling. We were like a well oiled machine, chatting and chopping and whisking. But, hey wait a minute...when did the pie crust go in the oven??? Eff. Turns out, we not only forgot to set a timer for the crust, but also failed to put in pie weights before baking. So yeah, it came out just a little burnt, and very shriveled. Oy. Thank god there was another crust in the package. 


The second time around, we nailed it. The crust was baked, filled, and then stuck back in the oven for one final round. The resulting quiche was flaky, creamy, savory, and every bit as delicious as we hoped it would be. Thanks, Mark!

Spinach and Mushroom Quiche (Adapted from The Faux Martha's recipe)
** Looking back at my recipes, I do seem to do the spinach/mushroom combo a lot. I know there are a lot more interesting flavor combos for vegetarian fare, but spinach/mushroom is just so delicious!

Ingredients:
- 1 store-bought pie crust, rolled out.
- 3 oz cream cheese, room temperature
- 1/3 cup heavy cream
- 3 large eggs
- 3-4 cups fresh spinach, boiled, drained, and chopped (Or, 1 package frozen chopped spinach)
- 1/2 cup grated cheddar
- 1/4 cup grated Parmesan
- 1/2 cup diced red onion
- 1 cup chopped portobello mushroom
- Salt/pepper to taste
- 1 tsp olive oil
- 1 tsp minced garlic

Steps:
(1) Preheat oven to 425.
(2) Press rolled out pie crust firmly into a pie dish, making sure it sticks firmly to the bottom/sides of the dish. lay a large sheet of wax paper on top of the pie crust, and line with dried beans or pie weights.
(3) Bake crust for about 10 minutes, then pull it out and set it aside to cool. Leave oven on.
(4) In a large pan, sautee the garlic, onion and chopped mushroom in olive oil until onion pieces are translucent. Season with salt/pepper to taste. Remove from heat, add spinach, and mix until well-combined. Set aside to cool.
(5) Beat cream cheese in a large bowl until smooth.
(6) Add eggs, then gradually beat in cream. Mix until smooth.
(7) Stir in cheese.
(8) Add spinach/mushroom to the creamy mixture, and stir until well-combined.
(9) Pour filling into the prepared pie crust.
(10) Bake for 20-25 minutes, or until the filling is set and lightly brown in spots on top.
(11) Cool for 10 minutes, then dig in!

For other great food ideas, click here or here.

Saturday, May 28, 2011

Strawberry Mille Feuille


As soon as I said I was going sit on my ass all day and do nothing, I got the urge to bake. And, of course, the more I thought about baking, the stronger the urge got, until it could no longer be resisted. Sigh. What can you do, right? Lets just chalk it up to me being totally dedicated to this blog.

So, why mille feuille? Because I saw Anthony Bourdain eating it on "No Reservations" last night, and it looked pretty tasty. Plus, he spent at least 15 minutes waxing eloquent about the virtues of this quintessential French dessert, so I knew it had to be good. Now, I wanted to try it for myself, but I wasn't feeling up to making my own puff pastry. So, I dragged Dan to the store to buy the pre-made stuff. Great decision. Instead of waiting a couple hours for the dessert to come together, we were able to sit down and enjoy this deliciously flaky, light and creamy treat in less than 30 minutes. Take that, Rachel Ray!

Recipe can be found here, courtesy of food.com.

Wednesday, May 18, 2011

Chicken Salad Sandwich


I secretly look forward to the days when we run out of deli turkey. Why? Because it gives me an excuse to make chicken salad. I mean, I could probably just make chicken salad whenever, but turkey goes bad so quickly that I feel like I have to eat it for lunch everyday when it's around so that I don't end up throwing any away.

I read in one of my chick lit books that Southern women judge the measure of a lady by the quality of her chicken salad. That can't be true, but if it were...I'd be a pretty low maintenance lady. I don't use chicken that I've personally roasted, I don't make my own mayonnaise, and I don't throw in any fancy pants ingredients for textural/flavor contrast. I just throw some chopped chicken (usually Perdue grilled chicken strips), diced red onion, Helmann's, and paprika in a bowl and mix it all together. Done in fifteen minutes, but super yummy. Great on top of a spinach salad or sandwiched between toasted wheat bread.

Chicken Salad Sandwich

Ingredients:
- 1 packet of Perdue grilled chicken, chopped; or, 1 grilled chicken breast, chopped
- 3 tbsp mayonnaise
- 1 tsp paprika
- 1/4 cup red onion, diced (I like the spicy crunch of red onion in my chicken salad, so I usually use more)
- 1/4 avocado, sliced thinly
- 3 tomato slices
- 4 large lettuce leaves, or 1 handful baby spinach
- 2 slices wheat bread, toasted

Steps:
(1) In a medium bowl, mix chicken, mayo, paprika, and red onion until well combined. (If you're feeling fancy, chop up some green onion or apple slices and throw that in too.)
(2) Layer one slice of toast with lettuce and tomatoes.
(3) Scoop two large spoonfuls of chicken salad on top of the lettuce/tomatoes. Spread out in one even layer.
(4) Arrange avocado slices on top of the chicken salad. Cover with second slice of bread.
(5) Cut in half and serve with pickles and chips.

Tuesday, February 22, 2011

Hotdog Sundaes


You know what the worst kind of day is? The worst kind of day is when you're hungry after a long day of doing absolutely nothing, and you shuffle over to the fridge for sustenance only to realize that your leftovers are unappetizing, you're not in the mood for pasta, and everything else that is cook-able is iced over in the freezer. Big time bummer.

So what can you do? Order out? A viable option, but that can get expensive. Go grocery shopping? No way, that would totally defeat the purpose of your lazy do-nothing day. Plus, it's cold out right now. That leaves you with option #3: rummage through your fridge/pantry, grab anything that catches your eye, throw it all together, and hope it's delicious. That's how Dan and I ended up eating hotdog sundaes for dinner last night.


Hotdog sundaes, you say? Disgusting! Unfathomable! HOW COULD YOU?! That's how I reacted the first time Karen told me about the special treat her mom used to make for her and her brothers. I pictured a standard sundae with bananas, ice cream, chopped up hotdog bits, and ketchup/mustard on top. Gross. Fortunately, Karen's mom is not a lunatic, and hotdog sundaes are not at all what I was imagining. For one thing, they're not meant to be a dessert. Thank god.  

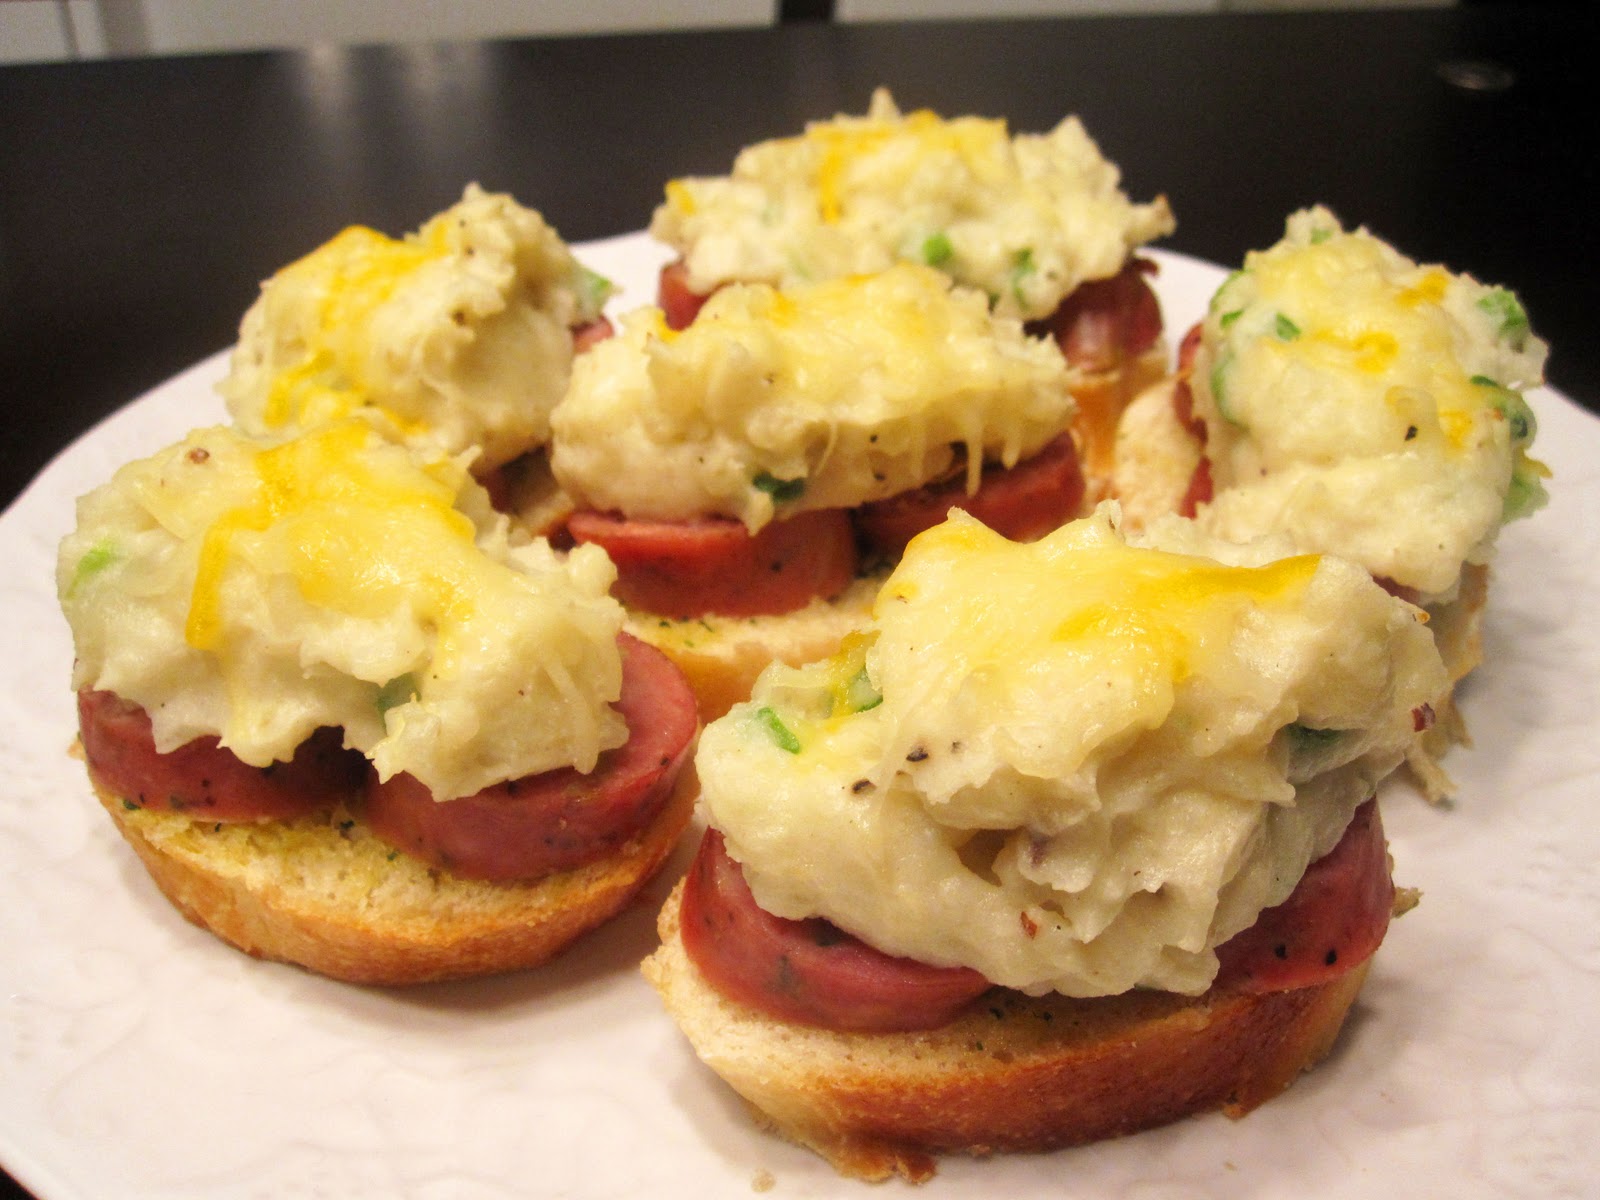
In this delightfully-named concoction, hotdogs (in a bun) take the place of bananas, and scoops of ice cream are replaced with scoops of mashed potatoes. Shredded cheese is sprinkled on in place of jimmies, and gravy (if you're so inclined) is drizzled instead of fudge or caramel. The end result should look like a seriously loaded street dog. Yum!

Hotdog Sundaes (Courtesy of Karen)
When I made this last night for dinner, I didn't have hotdog buns, so I sliced up a baguette and slathered  the pieces with garlic and herb butter. And, in order to spread out my two remaining turkey sausages, I chopped them into small pieces and layered those on top of the bread. Topped off with buttery green onion mashed potatoes and cheese, then toasted in the oven, these were absolutely scrumptious. If I were to serve them as an appetizer (and I definitely will), I would have to reduce the proportions of each component a lot more, because even in last night's reduced form these sundaes were a huge mouthful -- two or three mouthfuls, actually.

Ingredients: (1 sundae)
- 1 hotdog or sausage, cooked
- 1 hotdog bun, buttered
- 1 cup mashed potatoes, cooked
- Shredded cheese for sprinkling
- Gravy, if desired.

Steps:
(1) Preheat oven to 350
(2) Fully cook hotdog/sausage. Place inside hotdog bun.
(3) Using an ice cream scoop, generously heap hotdog with mashed potatoes. I like homemade chunky mashed potatoes with butter, garlic, and green onions, but instant mashed potatoes are good too.
(4) Place sundae on a baking sheet. Sprinkle with as much cheese as desired.
(5) Toast in oven for about 5 minutes.
(6) Serve plain or with gravy.
** For appetizer-sized sundaes, you can either chop up all the buns/dogs into small pieces like Karen usually does, or go with the baguette-layering route like I did last night.

Sunday, February 6, 2011

Wonton Cups with Spinach and Mushroom Ricotta Filling


Happy Superbowl Sunday, everyone! And...happy 1 year anniversary to my blog! To celebrate both momentous occasions, I spent the better part of the afternoon cooking: crab quesidillas, pizza dip, fresh guacamole, and...wonton cups with spinach and mushroom filling.

Why wonton cups? Well, I got really into cooking-themed books last year, and these cups were mentioned in passing in one of my books. There, the cups were filled with tuna tartare, but I had a feeling the people coming to my Superbowl party weren't going to be thrilled with raw fish, so I went with something a little tamer.


Who knew wonton wrappers were so versatile? I'd only ever used them to make wontons and crab rangoons, but they're actually quite effective as Tostito-esque scoops. And aren't they pretty? This is definitely something that looks fancier and more complicated than it actually is.

You can fill the cups with just about anything -- hummus, crab dip, salsa -- but I can tell you that sauteed spinach/mushrooms with ricotta was very tasty. The only downside is that, once filled, the cups lose a lot of their crisp/crunch over time. Maybe more time in the oven would fix this? Or perhaps frying vs. baking? 

Wonton Cups

Ingredients:
- 1 package of wonton skins

Steps:
(1) Preheat oven to 350
(2) Grease a mini muffin pan.
(3) Press a single wonton skin into each muffin cup. Make sure the skin doesn't fold in too much -- there needs to be enough space to fill with good stuff.
(4) Bake for 7-9 minutes, until lightly brown and crispy.
(5) Fill with anything you want, or serve as dip scoops.

Sunday, December 19, 2010

Mushroom Tart


This post is kinda misleading because I did not cook a single meal this week. Yup. It's true. Zero. Cooking. We ate out 3 out of the 5 days, ordered in another day, and the rest of the time we ate leftovers. The tart you see here was actually last weekend -- I just forgot to post it. Oops.


The thing about phyllo dough is that it's the best thing ever. Seriously. It's pre-made, keeps for a long time, can be used in a billion different delicious ways, and is perfectly buttery and flaky in a way that few home-made doughs are. Every time I read one of my favorite blogs and I see a tart with a perfect crust, I scroll down to the ingredients and immediately feel gratified when I see that they used phyllo dough. It makes me feel so much better about my own struggle with making dough from scratch.


I originally made this tart in preparation for lunch with a college buddy that was in town for residency interviews. BUT, she is a jerk and decided to stay home and eat her mom's homemade Chinese food for lunch instead. How rude! Kidding, kidding.

In the end, the tart was devoured by me, Dan and Emily. The crust was flaky and buttery, the cheese was gooey and savory, and the mushrooms were fragrant and delicious. So good fresh out of the oven, and surprisingly still tasty the next day...even if the crust was a tad soggy.

Recipe** courtesy of the Kitchen Wench.

**Just a couple comments about the recipe:
(1) If you don't have goat cheese, just use 4 oz of cream cheese instead. It was still tangy and delicious.
(2) I made two tarts, and forgot to add egg to the topping mixture for one of them. I actually liked that one a lot better -- it was a lot more creamy/melty.
(3) I cut up big chunks of fresh mozzarella and layered it over the top of the tart, then sprinkled some sea salt on top for extra flavor. If you like pizza that has ropes of cheese pull away with every bite, you'll definitely want to do this.

Saturday, June 12, 2010

Spinach & 4-Cheese Quesadillas


Yesterday was the second gathering of the Summer Supper Club, and it was Mexican night. After a long and painful week of bar studying, we needed the comfort of oozing cheese and guac and sour cream to help us unwind. So we blended up some mango margaritas, parked ourselves on my couch, and feasted on spinach & cheese quesadillas, enchiladas, 3-bean dip, homemade salsa, and apple-pie enchiladas (for dessert).


The thing about quesadillas is that they're delicious and easy to make. Dinner was set for 7:30, and I didn't start cooking until nearly 7, but by the time everyone had arrived, I already had a huge pile of fresh quesadillas waiting on the table. Rachel Ray would be so proud!


Not much to say about these quesadillas other than that they were delicious, and we all enjoyed them. The tortilla was just slightly toasty from the hot pan, the cheese was wonderfully melty, and the spinach was a nice foil for the rich cheese. Delicious with salsa and loads of guac and sour cream.

Spinach & 4-Cheese Quesadillas

Ingredients: (1 quesadilla)
- 1 flour tortilla (large)
- 1 cup of shredded 4-cheese Mexican cheese (and a little extra for sprinkling)
- 1/2 cup baby spinach

Steps:
(1) Toast one side of the tortilla in a hot pan on medium heat. Flip when hot and just slightly toasty.
(2) Sprinkle entire tortilla with 1 cup of cheese. Let cheese melt, about 20 seconds.
(3) Cover one half of the cheese/tortilla with spinach. Sprinkle the rest of the cheese over the spinach (for adhesive).
(3) Fold tortilla in half. Press down firmly, especially on the edges, to make sure everything sticks.
(4) After 30 seconds, flip quesadilla over to toast the other side.
(5) Remove from pan and onto cutting board. Cut into 4 pieces.

Sunday, April 25, 2010

Chocolate Coffee Ice Cream Cake


Now that I'm free and in the clear school-wise, my friends have been sending me links to recipes they know I have plenty of time to try out. This unique ice cream cake was at the top of the "Tina, please make this for us!" list. 


The recipe called for cake mix. Usually, I try to stay away from boxed mixes. I just feel so much more accomplished when I make things from scratch, you know? But no one can a culinary superstar all the time, and there's just no denying that sometimes boxed mixes just taste better.


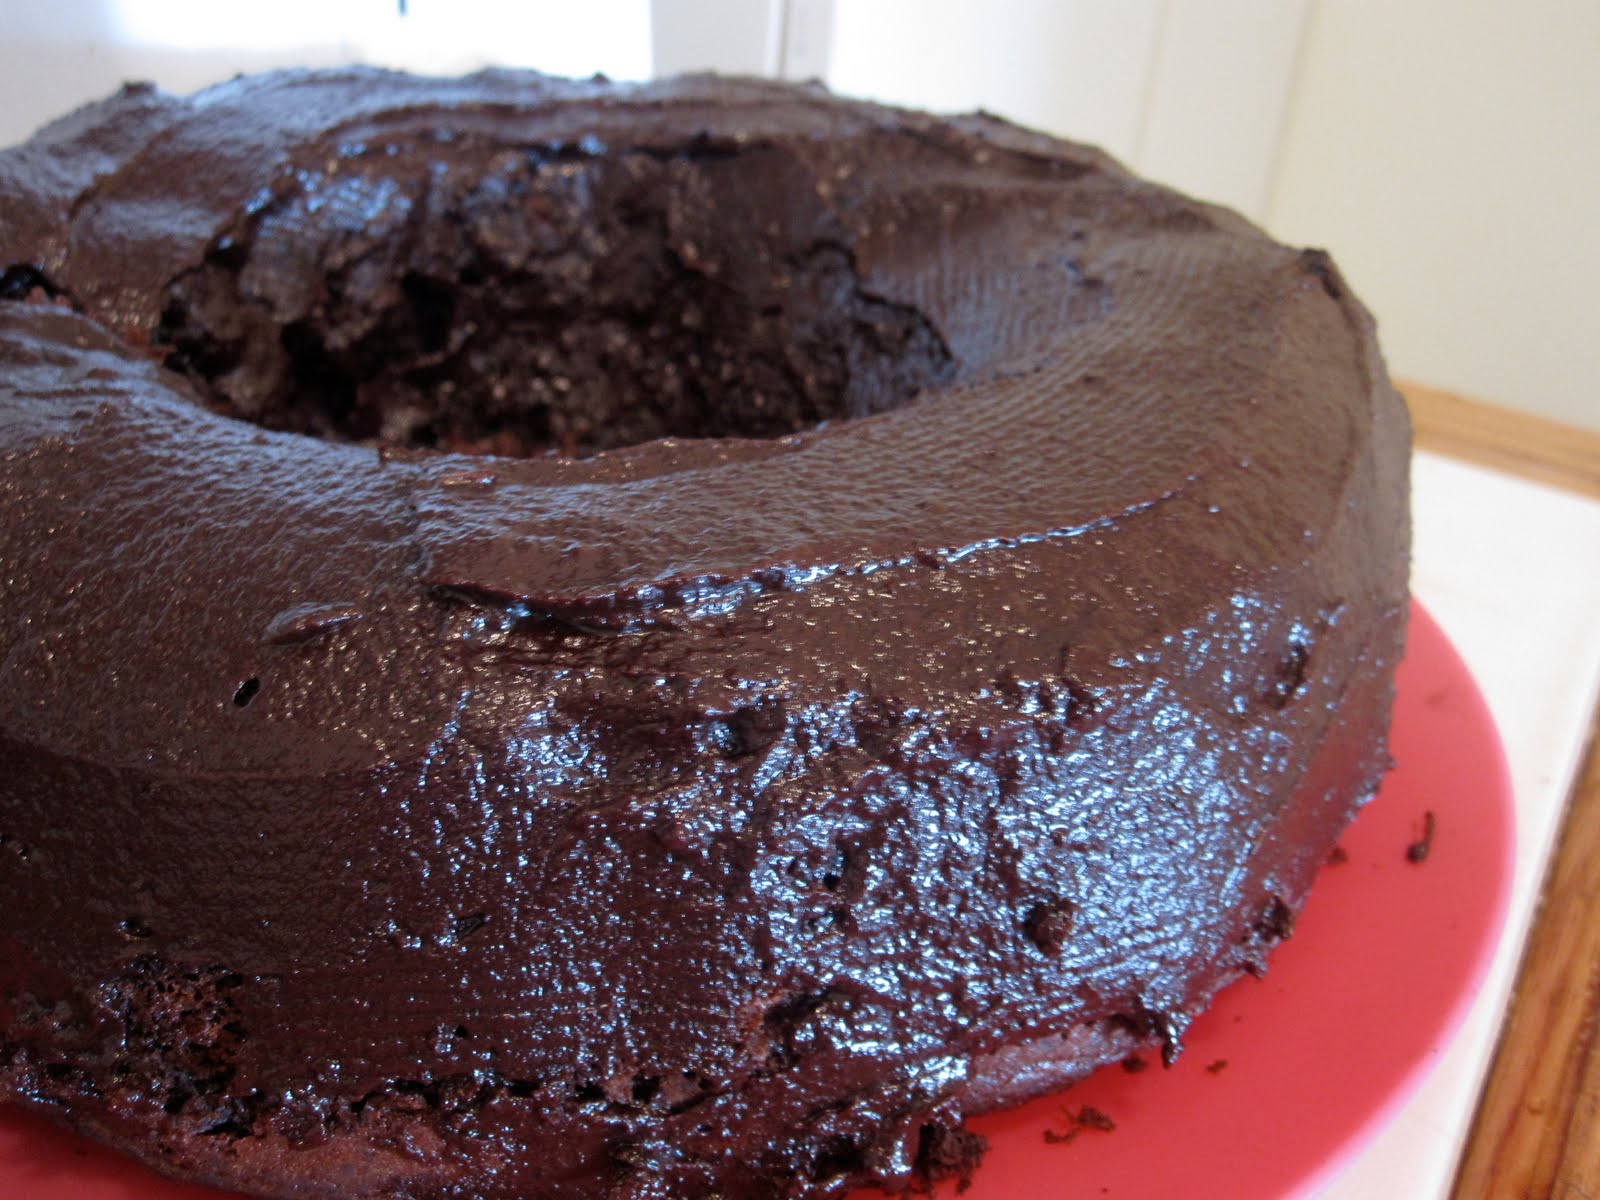
So, what's so special about this cake? It's made with ice cream! But not like a Baskin Robbins ice cream cake, where there's a layer of ice cream sandwiched between layers of cake. Here, the ice cream is literally mixed into the batter. For this cake, I chose coffee flavored ice cream.


The ice cream in this recipe acts like a substitute for milk in a regular chocolate cake, but the resulting batter is a lot creamier in consistency.


The batter looks a lot like melted ice cream going into the oven, but it turns out to be a pretty nice cake. Just be sure to thoroughly grease and flour (I dusted with cocoa powder) your bundt cake pan, or you'll end up with only half the cake on your plate like I did. Ugh.


I am absolutely going to add ice cream to every cake I bake from now on. I couldn't really taste coffee at all, but the cake was unbelievably moist and soft -- probably the best cake I've ever made. Chocolate ganache was a great touch, but the cake is so good by itself I may not use any kind of icing next time.

Recipe and backstory can be found here.

Sunday, March 21, 2010

Chocolate Gooey Butter Cake With Peanut Butter Chips


"Some fellow asked me the other day, 'Paula, do you make any low calorie dishes?' I turned to him and said 'Honey, I’m not your nurse – I’m your cook!' Then for good measure I probably added some more butter!"  (Paula Deen)

I was going to a potluck today and needed to make a something that was delicious and could feed tons of people. This dish immediately came to mind -- Paula Deen recipes are always popular, and the portions tend to be very generous.


According to Wikipedia, a real St. Louis gooey butter cake has a bottom layer made up of butter and yellow cake. I don't actually like yellow cake, so I always go with chocolate instead. Yellow cake is just so boring, you know?


Mmm, look at all that powdered sugar. Powdered sugar, eggs, cream cheese, and butter -- is it any wonder that this cake is divine?


After the cake comes out of the oven, the middle is still jiggly, and it only solidifies a little bit during cooling. When you bite into a piece, the center is all hot and melty, and before you know it you've made a mess all over your face and hands in your haste to shovel every last delicious morsel into your mouth. In the words of Julia Child: "Mmm...BUTTER."


Chocolate Gooey Butter Cake With Peanut Butter Chips
 (A very slightly modified Paula Deen recipe)


Ingredients:

(Bottom layer)
- 1 pack of cake mix (CHOCOLATE.)
- 1 stick of butter, melted
- 1 egg

(Top layer)
- 8 oz. cream cheese, room temperature.
- 1 stick of butter, melted
- 2 eggs
- 1 tsp vanilla
- 1 bag of powdered sugar (16 oz)
- 1 cup peanut butter chips (or whatever kind you like -- toffee is always great too)

Steps:

(1) Preheat oven to 350.
(2) Combine cake mix, melted butter and egg. Press dough into bottom of a 13x9 pan.
(3) In a large bowl, cream the cream cheese until smooth. Add eggs and vanilla.
(4) Gradually stir in powdered sugar until well mixed.
(5) Pour cream cheese batter into the pan on top of the chocolate cake layer.
(6) Sprinkle peanut butter chips on top of the batter.

(7) Bake for 40-50 minutes. Don't overbake -- the center of the cake is supposed to still be jiggly and gooey when it comes out of the oven.

Monday, February 8, 2010

Easy Veggie Pizza


Ah, Superbowl Sunday. A day of feasting on fat things -- chips, dips, fried things, sweets, and every possible permutation of breaded chicken.  Great for the taste buds, not so amazing for the waist line. Who was it that said "a moment on the lips, a lifetime on the hips"?


So I decided to whip up something healthy-ish (but still tasty) for the Superbowl party Karen and I were going to.  I've made this dish for other parties and it's always been a big hit.  No one can resist pizza!  And besides, what's healthier than a big pile of raw vegetables?


One of the best things about this recipe, aside from its taste and simplicity, is how pretty the final product is. With so many different vegetables mixed together, there's no shortage of eye-catching colors -- it's like eating the rainbow, or maybe a Picasso painting.  I like to use cauliflower, carrots, broccoli, cucumbers, and red onions, but if you like peppers, bell peppers and banana peppers are also a nice touch.


You know that Hidden Valley Ranch commercial where a bunch of kids are at a birthday party and they're gobbling up vegetables like candy because everything is covered in Ranch dressing? This is kinda how this pizza works -- take a flaky crust, cover it with creamy Ranch-y stuff, then load it up with vegetables that complement the sauce.  It's like a veggie platter disguised as something much more appealing.  Guess what future my kids are going to get when I want them to eat vegetables?


Easy Veggie Pizza

Ingredients:
2 cans, 8oz. Pillsbury crescent rolls
1 package dry ranch dressing
3/4 cups mayonnaise
8 oz. cream cheese, softened
Any vegetables you want (I tend to use broccoli, carrots, cucumbers, onions, and cauliflower)

Steps:
(1) Preheat oven according to crescent roll label. (Usually 375 degrees)

(2) In a medium-sized bowl, mix ranch dressing, cream cheese and mayo until smooth. Set aside.

(3) Chop vegetables into small pieces (See pictures -- I use a faux-Bullet hand chopper). Mix vegetables in large bowl and set aside.

(4) Unroll each crescent roll onto a lightly greased pan. Bake as directed. (About 12 minutes, or until rolls are golden brown.)

(5) Once rolls are cool, divide dressing mix between the two pans and spread evenly.

(6) Top rolls with chopped vegetables.