Showing posts with label Healthy. Show all posts

Tuesday, August 30, 2011

Blueberry Muffins


I woke up this morning with the most intense craving for a gigantic blueberry muffin. You know, one of those sugar-crusted monstrosities from Costco that's packed to bursting with fat blueberries. Those things are so bad for you, but they're so delicious! They're really just dessert masquerading as breakfast. (Which is fine by me -- my parents used to let me eat cake and pie and ice cream for breakfast all the time.)


These days, my metabolism really can't handle actual desserts or an entire Costco muffin for breakfast anymore, but I can certainly put away a whole bunch of these equally yummy, normal-sized muffins. There is less than a cup of sugar in the whole batch, and two cups of fresh, juicy berries go into the batter. I'm pretty sure one of these muffins satisfies at least one daily recommended serving of fruit...maybe.

Blueberry Muffins (Adapted from the Mochi Thoughts recipe)

Ingredients: (Makes exactly 1 dozen muffins)
- 1-1/2 cups flour
- 3/4 cup white sugar
- 1 tsp salt
- 2 tsp baking powder
- 1/3 cup vegetable oil
- 1 large egg
- A little over 1/3 cup milk
- 2 cups fresh blueberries

Steps:
(1) Preheat oven to 400, and fill a muffin tin with cupcake liners.
(2) In a large bowl, mix all the dry ingredients until well combined.
(3) Slowly stir in the oil and egg. Batter should be very thick.
(4) Add milk. If 1/3 cup is not enough to thin out the batter, add more slowly.
** I used between 1/3 and 1/2 cup total. Batter should be a little thicker than pancake batter.
(5) Gently mix in blueberries.
(6) Scoop about 1/4 cup batter into each muffin cup.
(7) Gently press 3-4 blueberries onto the top of the batter in each muffin cup. The batter should be thick enough that the blueberries won't sink in.
(8) Bake for 20 minutes.
(9) Best eaten warm, but delicious any time.

For other great food ideas, click here or here.

Saturday, July 23, 2011

Zucchini Cakes


I think it's safe to say that the zucchinis have won. Dan and I are officially sick of the stuff -- we've eaten zucchini in some form or another every single day this week. Roasted, mainly, but also sauteed, mixed in with scrambled eggs, and cut into strips for fries. These zucchini cakes were a last ditch effort to keep the fruits of last weekend's labor from going to waste, but there's still one gigantic squash left. Thankfully, my parents were happy to take that off our hands before it started festering in a dark corner of my fridge.


Tired as I am of zucchini, these cakes were still pretty tasty. Kind of like crab cakes, only filled with zucchini instead of crab meat. I seasoned them with Adobo spices for a little zest, and that helped temper the intense zucchini flavor. If I weren't so zucchini'd out, I would actually really be a huge fan of these -- they're tender, flavorful, and relatively healthy. Definitely a great way to allow zucchini to be the star of the dish.

Zucchini Cakes (Adapted from The Life's Ambrosia's recipe)

Ingredients:
- 1 large zucchini, grated
- 1 large egg
- 1 cup panko bread crumbs
- Salt/pepper to taste
- 1 tbsp Adobo spices
- 1/2 cup Parmesan cheese, grated

Steps:
(1) Remove excess liquid from freshly grated zucchini by placing them between paper towels and squeezing.
** There will be a LOT of excess liquid, so I suggest you squeeze over the sink.
(2) In a large bowl, combine all the ingredients. Mix thoroughly.
(3) Heat a large pan on medium, and spray with Pam. Shape spoonfuls of the zucchini batter into 2-inch (diameter) patties, and drop onto the sizzling pan. Cook each side for about a minute and a half, or until the outside is golden brown.
(4) Finish the cakes off in the oven -- stick them on a baking pan and broil them for 1-2 minutes.
** Note: I skipped this step when I made my cakes, so the sides were still kind of soft -- not really a problem in terms of taste, but if you want a nice crust to form on the sides too, finishing them off in the oven should do the trick.
(5) Serve hot, alone or with ranch dressing.

** Hey! These cakes caught the attention of Glamour Magazine! **

Thursday, March 17, 2011

Colcannon


Happy St. Patty's Day, everyone! Are you wearing green? I'm not. I don't really own anything green; it's not a great color for me. Thank god no one at work is fanatical about the whole wear-green-on-St. Patty's Day-or-get-pinched thing. That would have sucked! Elementary school bus rides really traumatized me on that front.

Anyway, I've been thinking long and hard about what to do for my St. Patty's Day post. Something green? Something with Guiness or whiskey? Something super Irish? I did the first two last year, so I decided to go Irish this year. What do Irish people eat? Shepherd's pie...corned beef...soda bread...potatoes! Gotta have potatoes. 


The Simply Recipes blog had a post on Colcannon earlier this week that looked pretty tasty, and I really wanted to try it. What is colcannon, you ask? It's a traditional Irish dish consisting mainly of mashed potatoes mixed with kale or cabbage and served with a heap of butter. It sounds kind of weird, but apparently it's so good that there's even a song about it.

I was a little hesitant about cooking kale, because I had never eaten it before, but...turns out I actually have eaten it before! Raw, it didn't look familiar, but as the cooked kale/garlic smell wafted out of the pan and hit my nose, I realized that kale is the mysterious green leafy vegetable my parents always cooked at home but never knew the English name for. Awesome! And delicious. Mashed potatoes are always good, but they're even better when a salty, textured vegetable is thrown into the mix, with a big dollop of butter. Those Irish folk really knew a thing or two about eating potatoes...

Recipe for colcannon can be found here, courtesy of the Simply Recipes blog.

One year agoGodiva Chocolate Cupcakes with Mint Buttercream Frosting

Sunday, January 30, 2011

Sushi -- Unagi Rolls and California Rolls


Hello, all. I'd like to introduce everyone to my third guest blogger -- my good friend Christina Feng. We were near inseparable in our first two years of college, but the only time I ever saw her in the kitchen was the time we made fortune cookies for our friend Jimmy's birthday. Turns out she was hiding secret cooking powers from me! But now the cat is out of the bag, and she's here today to share a recipe with us. I'm ghost-writing the blog entry, but all pictures are courtesy of Christina. Thanks, Stina!


So Christina's boyfriend's parents are in town this weekend, and like the good girlfriend-in-law that she is, she decided to treat them to a delicious home-cooked meal. Miso soup to start, unagi and california rolls as the main course, and mochi ice cream for dessert. Yum!


I've never made sushi before, but Christina tells me it's easy so long as you have one of those bamboo mat thingies for rolling. I remain skeptical, but I suppose it's one of those practice-makes-perfect situations. Meanwhile, doesn't that eel look scrumptious? California rolls will always have a special place in my heart -- for the longest time it was the only kind of sushi I could convince Dan to eat -- but I love unagi the most. If you ever go to a sushi restaurant with me, be sure to call dibs on the eel as soon as it gets to the table, 'cuz I'm definitely going to eat it all.


Jason sure is a lucky guy! And after a meal like this, how can his parents not love Christina too? Will you make this for me sometime, Stina???

And now a word from Christina herself on the actual recipe:

OK soooo in terms of a recipe, I don't really have one particular one that I went with because I did this once before and I kinda just made it up as I went along and/or took bits and pieces from random recipes I found online.

Ingredients: 
- Frozen unagi kabayaki (from Asian store)
- Imitation crab sticks
- 1 avocado cut into thin strips
- 1 cucumber cut into thin strips
- Sushi rice (4-5 cups makes about 5 to 6 rolls)
- Sushi vinegar
- Sushi seasoning
- Roasted seaweed

(Need bamboo sushi roller)

Steps:
(1) Cook unagi per package instructions (the one I got I just heated in boiling water for 10 minutes), then cut it into strips. Set aside.
(2) Cover bamboo roller with saran wrap and place one sheet of roasted seaweed over it.
(3) Prepare sushi rice, mix with small bit of sushi vinegar in a bowl before placing on seaweed.
(4) Spread rice over roasted seaweed in a thin, even layer, and press it into the seaweed to maximize stickiness.
(5) Sprinkle sushi seasoning over rice. (Some people who like wasabi can then mix wasabi into the rice, but I didn't cuz I hate wasabi)
(6) Place strips of either imitation crab or unagi across seaweed, depending on which roll you're making.
(7) Place sticks of cucumber and/or avocado across seaweed.
(8) Use bamboo roller to tightly roll the sushi.
(9) Cut roll into 1/2" pieces (Since sushi is sticky, use a really sharp knife. Neat trick here is to use water to wet knife then cut if the knife gets too sticky)
(10) Serve! (with soy sauce of course...)

Monday, January 24, 2011

Pan Seared Tilapia with Avgolemono Sauce


I've been in kind of a cooking rut lately. I haven't been reading as many cooking blogs, and no recipes have been particularly eye-catching or inspiring. So, we've been eating a lot of delivery -- Chinese food, Domino's...the usual junky suspects. And lets not forget the long weekend in Colorado, where we gorged ourselves on birthday cake, lasagna, and tacos after braving the slopes. Yum.

But, my rapidly tightening waistband has awakened me to the sad fact that I need start eating less greasy crap and start cooking healthy and delicious meals at home. And maybe exercise occasionally. Maybe. But definitely the healthy cooking thing.


What could be healthier than fish? Nothing! And I just happened to have a freezer full of vacuum-sealed tilapia fillets begging to be eaten. But, I haven't dealt with tilapia very often, and didn't really know what to do with it. So, I turned to Kevin over at Closet Cooking for inspiration, and he didn't let me down.

Pan Seared Tilapia with Avgolemono Sauce. What is avgolemono, you ask? I've never heard of it, but Wikipedia tells me that it's a Greek soup made with egg and lemon mixed with broth. It's also creamy and delicious, airy, with a delicate lemony-eggy flavor. I would have never thought to eat it on fish, but the two just make sense on the plate and in the mouth. That Kevin is a genius!

For the recipe, check out Kevin's blog.

Monday, June 7, 2010

Oven-Fried Pickles


In lieu of the southern-themed dinner with the Summer Supper Club, I decided to make some fried pickles to snack on throughout the meal. I've only ever had fried pickles once before, but I found them to be absolutely delicious -- crispy, salty, sour -- and totally addictive. Like pistachios, they are impossible to stop eating once you taste one.


The problem with making fried pickles is that I don't have a fryer. I don't even have a deep pot that I can substitute for a fryer. Plus, I'm trying to watch my girlish figure, so eating deep fried food probably isn't a great idea anyway. Fortunately, baking is always an acceptable alternative, and Google presented me with bazillions of different oven-fried pickles recipes to choose from.


The last time I fried something, it was jalapeno poppers. For the breading, I dipped them in milk, then rolled them with bread crumbs. Pretty standard stuff. Fried pickles, on the other hand, aren't breaded quite the same way. They're not dipped in anything, since they're already moist from floating in their own juices, and they're rolled around in a combination of cornmeal, grated cheese, and spices. Interesting.


Lesson learned from this cooking exercise: oven-fried is not the same thing as deep fried. Not even close, in fact. After sticking the tray of breaded pickles into the oven for 12 minutes like the recipe said, I expected them to come out nice and crispy like baked potato chips. Nope. They were still soggy. Soggy! I ended up sticking them back into the oven for about 15 minutes longer than the recipe asked for, and I had to flip every pickle in order to get them to crisp up on both sides. Talk about time-consuming! And they still weren't as crisp as I wanted them to be. Next time I'm just going to buy a fryer.


Even though these suckers weren't as crispy as they should have been, they were still pretty tasty, and every last one of them got eaten. They were salty and sour as pickles should be, but slightly zesty from the breading, and were delicious dipped in ranch dressing. The recipe definitely needs tweaking, but these are a great snack anyway.

Recipe courtesy of recipe4living.com.

Sunday, May 23, 2010

Eggs-in-a-Hole


Dan (on the phone): "What are you up to?" 
Me: "I'm making eggs in a hole." 
Dan: "...why are you in a hole?" 
Me: "No, I'm making eggs in a hole. Like...cooking eggs inside a piece of bread."
Dan: "Weird."


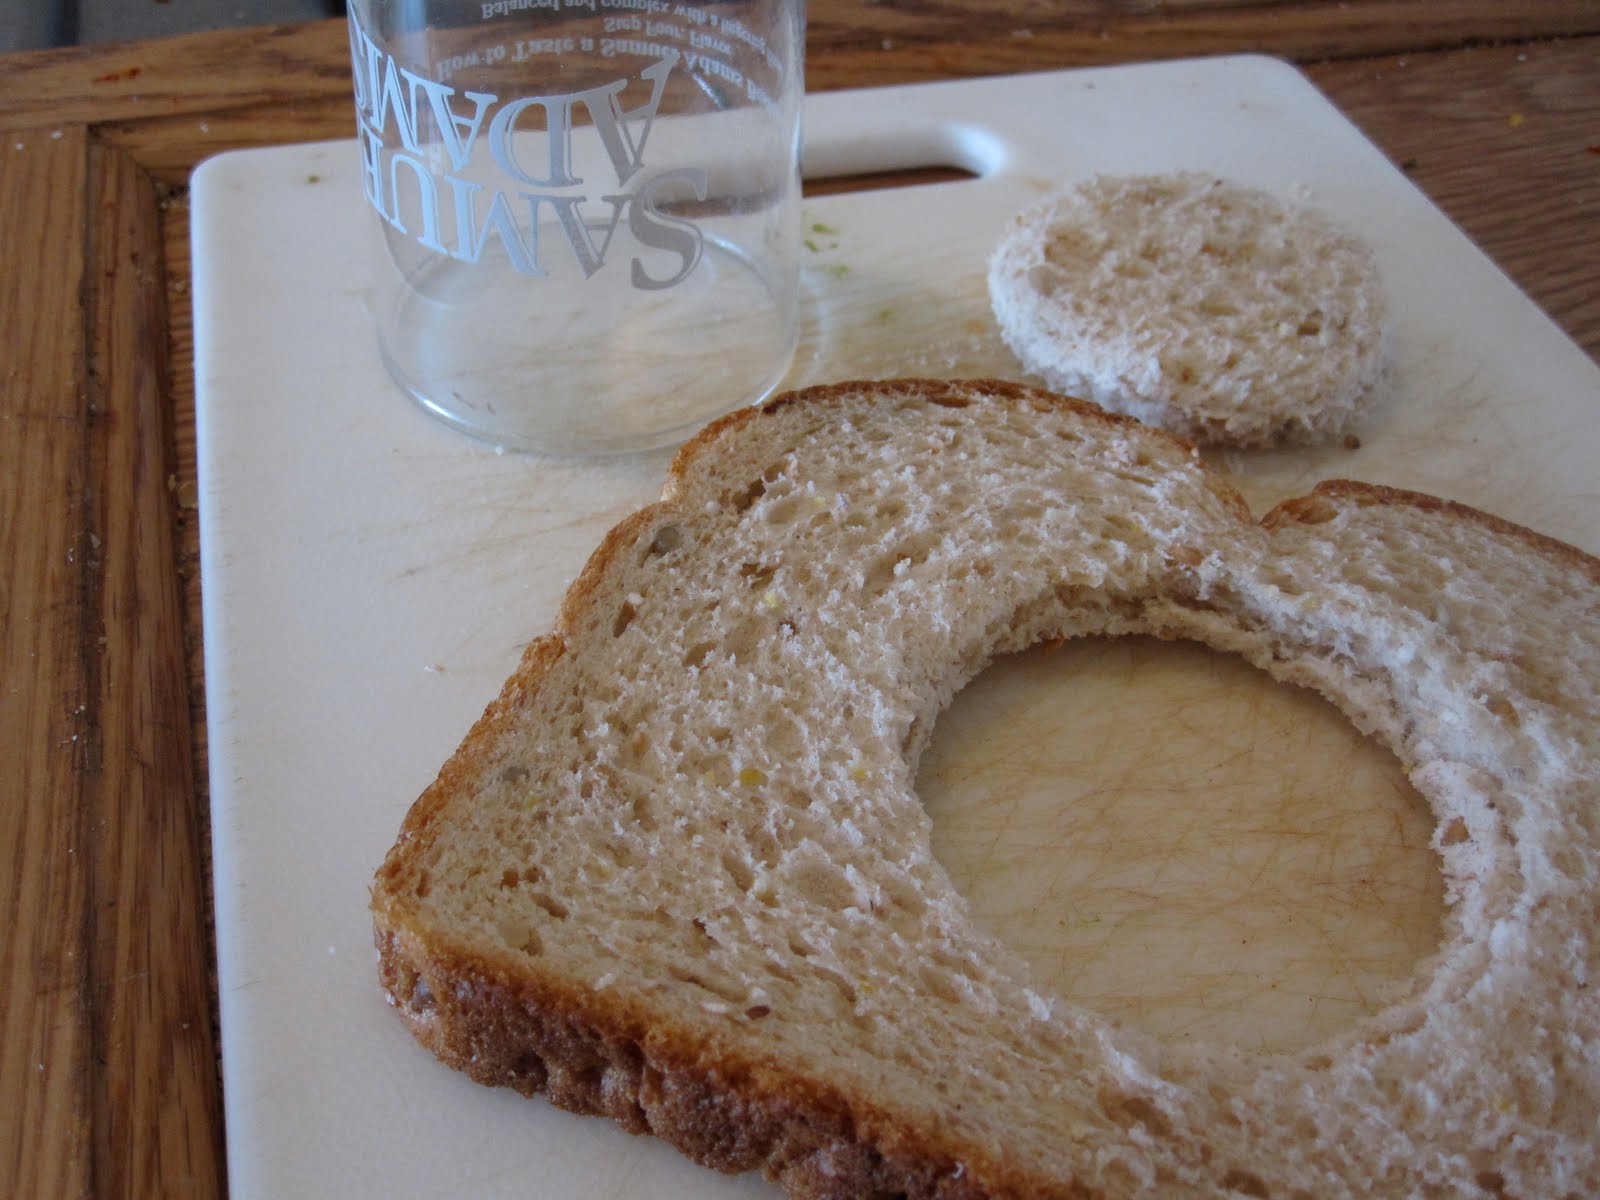
Actually, eggs-in-a-hole aren't weird at all! Super delicious, maybe, but not weird. And it's really easy to make. Just take a small drinking glass, cut a hole in the middle of a slice of bread, crack an egg into the hole, and boom -- instant delicious meal.


I had a little bit of trouble with flipping today. Usually the egg cooks right into the bread and it's easy to turn the whole thing over at once. But I had the pan on lower heat than usual, to avoid frying the egg, and forgot to take into account the fact that lower heat = slower cooking. So when I went in for the flip, the egg hadn't adhered to the bread yet, and the whole thing almost fell apart. Luckily, after I let the egg cook on the same side for another minute, the problem was solved.


Once the bread + egg were properly flipped and toasted, I just threw on a handful of shredded cheese, sauteed up some spinach, tossed on some over-ripe avocados, and dug in. Delicious! 

Eggs-in-a-Hole

Ingredients:
- 1 slice of bread (I used 9-grain)
- 1 egg
- Pinch of salt

Steps:
(1) Take a shot glass or small drinking glass, and cut a hole in the center of the bread. Set aside the bread circle.
(2) Toast bread in pan on medium heat. Crack the egg into the hole. Cook for about a minute, or until the egg moves with the bread when you lift a corner with a spatula.
(3) Gently flip the bread over to cook the other side of the egg. Cook for a minute. The yolk should still be runny when you cut into it.
(4) Sprinkle with salt.
(5) Serve with sides of your choice.

Saturday, March 6, 2010

Eggs Florentine with Avocado


I woke up this morning with the worst craving for eggs.  Probably because it's the weekend, and I've got brunch on the brain.  Alas, going out for brunch was out of the question -- I just got back from a spring break cruise and can't afford to be spending any more $$$.  Fortunately, eggs and spinach are cheap, so one short trip to Safeway later, I was ready for breakfast.


This was my first time poaching an egg.  I've scrambled, boiled, fried, deviled and omelette'd the suckers, but poaching always seemed beyond my culinary powers.  When I finally worked up the courage to google "how to poach an egg," I was surprised by how fast and simple it actually was.

Technically Eggs Florentine = poached eggs with spinach on an English muffin, but I had some avocados getting too ripe in the fridge, so I decided to slice them up and eat them with my eggs. Hence, Eggs Florentine with Avocado.  Fact: avocados taste great with everything.


Mmm, look all that avocado. A feast for the eyes and mouth -- definitely a hearty and healthy breakfast.


Every recipe I found for Hollandaise sauce called for 4 egg yolks and a stick of butter.  I didn't want to eat an entire stick of butter for breakfast or die from high cholesterol, so I cut the recipe down to 2 egg yolks and half a stick of butter.  Unfortunately, I forgot to also reduce the amount of lemon juice, so my sauce turned out a little tangier than I expected.  But mainly it was buttery and delicious.


I got a little carried away with taking pictures, so by the time I got around to eating, my eggs were cold. Still tasty, but note to self for next time: less picture taking, more eating.

Eggs Benedict with Avocados

Ingredients:
- 2 eggs
- pinch of salt
- 1 tbsp white vinegar
- 1 cup spinach
- 1/2 large avocado, sliced
- 1 English muffin, toasted
- 1/2 stick of butter
- pinch of salt
- 1/2 tbsp lemon juice
- 1/2 tbsp hot water

Steps:
(1) Fill pot with about 2 to 3 inches of water. Bring to boil. Reduce heat until water has tiny bubbles, but is no longer boiling.

(2) Add vinegar and salt to the water and stir to create a funnel in the water.

(3) One at a time, crack eggs into a plate or shallow bowl. Gently ease the eggs into the funnel in the water. Use a slotted spoon to gently wrap egg whites around the yolks, if necessary.

(4) Cook for 2-3 minutes, then use slotted spoon to lift eggs out onto paper towels. Gently pat eggs dry.

(5) Stir fry spinach with a little oil and salt to taste.  Cover each half of a toasted English muffin with the cooked spinach, and sliced avocados. Top with poached eggs.

(Sauce)
(6) Melt butter in saucepan on medium heat until butter is foamy. Lower heat.

(7) In a small bowl, mix lemon juice, egg yolks, and salt.  Gradually add melted butter to mixture, whisking constantly (or else eggs will scramble) until thick.

(8) Add water and whisk -- this will thin out the sauce.

(9) Return mixture to saucepan on low heat, and stir until sauce gets thick again. Serve immediately.

Monday, February 8, 2010

Easy Veggie Pizza


Ah, Superbowl Sunday. A day of feasting on fat things -- chips, dips, fried things, sweets, and every possible permutation of breaded chicken.  Great for the taste buds, not so amazing for the waist line. Who was it that said "a moment on the lips, a lifetime on the hips"?


So I decided to whip up something healthy-ish (but still tasty) for the Superbowl party Karen and I were going to.  I've made this dish for other parties and it's always been a big hit.  No one can resist pizza!  And besides, what's healthier than a big pile of raw vegetables?


One of the best things about this recipe, aside from its taste and simplicity, is how pretty the final product is. With so many different vegetables mixed together, there's no shortage of eye-catching colors -- it's like eating the rainbow, or maybe a Picasso painting.  I like to use cauliflower, carrots, broccoli, cucumbers, and red onions, but if you like peppers, bell peppers and banana peppers are also a nice touch.


You know that Hidden Valley Ranch commercial where a bunch of kids are at a birthday party and they're gobbling up vegetables like candy because everything is covered in Ranch dressing? This is kinda how this pizza works -- take a flaky crust, cover it with creamy Ranch-y stuff, then load it up with vegetables that complement the sauce.  It's like a veggie platter disguised as something much more appealing.  Guess what future my kids are going to get when I want them to eat vegetables?


Easy Veggie Pizza

Ingredients:
2 cans, 8oz. Pillsbury crescent rolls
1 package dry ranch dressing
3/4 cups mayonnaise
8 oz. cream cheese, softened
Any vegetables you want (I tend to use broccoli, carrots, cucumbers, onions, and cauliflower)

Steps:
(1) Preheat oven according to crescent roll label. (Usually 375 degrees)

(2) In a medium-sized bowl, mix ranch dressing, cream cheese and mayo until smooth. Set aside.

(3) Chop vegetables into small pieces (See pictures -- I use a faux-Bullet hand chopper). Mix vegetables in large bowl and set aside.

(4) Unroll each crescent roll onto a lightly greased pan. Bake as directed. (About 12 minutes, or until rolls are golden brown.)

(5) Once rolls are cool, divide dressing mix between the two pans and spread evenly.

(6) Top rolls with chopped vegetables.