Thursday, May 27, 2010

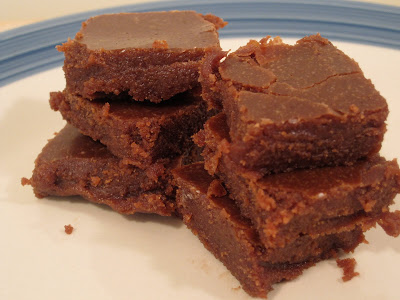
Flourless Chocolate Cake


The other day something unprecedented happened: I ran out of flour. I may not always have all the random ingredients required for my recipes, but I always have flour. And sugar. And butter. I have an entire box full of basic baking supplies that I always keep stocked so that I can whip up something tasty at a moment's notice. Somehow I had let my flour supply dwindle into nothingness. Disaster! 


Rather than going to Safeway to restock, I decided to Google recipes that didn't require flour. (It's a million degrees outside, I refuse to go out if I can avoid it.) The first recipe that popped up: flourless chocolate cake. How could I have forgotten about flourless chocolate cake?


This was probably the easiest, least fussy cake I've ever made. Melt some butter and chocolate, throw in some sugar and eggs and cocoa, and bake. 20 minutes later, a rich, sinfully chocolate-y dessert pops out of the oven. Mmm, chocolate.


I considered throwing in some ice cream, since I had vowed to always use ice cream in my cakes from now on. But, I figured that the cake would be plenty moist and rich as is, so I changed my mind. If it ain't broke...


The cake was a success! Dense, rich, and intensely chocolate-y. Delicious by itself, but even better with a little caramel drizzled on top.

Recipe from Epicurious.

Sunday, May 23, 2010

Eggs-in-a-Hole


Dan (on the phone): "What are you up to?" 
Me: "I'm making eggs in a hole." 
Dan: "...why are you in a hole?" 
Me: "No, I'm making eggs in a hole. Like...cooking eggs inside a piece of bread."
Dan: "Weird."


Actually, eggs-in-a-hole aren't weird at all! Super delicious, maybe, but not weird. And it's really easy to make. Just take a small drinking glass, cut a hole in the middle of a slice of bread, crack an egg into the hole, and boom -- instant delicious meal.


I had a little bit of trouble with flipping today. Usually the egg cooks right into the bread and it's easy to turn the whole thing over at once. But I had the pan on lower heat than usual, to avoid frying the egg, and forgot to take into account the fact that lower heat = slower cooking. So when I went in for the flip, the egg hadn't adhered to the bread yet, and the whole thing almost fell apart. Luckily, after I let the egg cook on the same side for another minute, the problem was solved.


Once the bread + egg were properly flipped and toasted, I just threw on a handful of shredded cheese, sauteed up some spinach, tossed on some over-ripe avocados, and dug in. Delicious! 

Eggs-in-a-Hole

Ingredients:
- 1 slice of bread (I used 9-grain)
- 1 egg
- Pinch of salt

Steps:
(1) Take a shot glass or small drinking glass, and cut a hole in the center of the bread. Set aside the bread circle.
(2) Toast bread in pan on medium heat. Crack the egg into the hole. Cook for about a minute, or until the egg moves with the bread when you lift a corner with a spatula.
(3) Gently flip the bread over to cook the other side of the egg. Cook for a minute. The yolk should still be runny when you cut into it.
(4) Sprinkle with salt.
(5) Serve with sides of your choice.

Tuesday, May 18, 2010

Lemon Rum Madeleines


I always thought madeleines were cookies. Am I alone in this? They look like little shell-shaped cookies. But when I gave them to my friends today, one of them took a bite and immediately said "Whoa, is this like, the tiniest cake ever?" Turns out...yes...yes they are. According to wikipedia, madeleines are actually very small sponge cakes


Madelines are made with genoise cake batter, which means that instead of using chemical leavening, air is added during the mixing process to give the cake volume. Translation: lots and lots of beating make the batter light and airy. I had to bust out my electric mixer for this one.


The recipe I was using called for orange extract and orange zest. I had neither orange flavoring nor oranges. I did, however, have rum-flavored extract and lemon juice. Since madeleines are traditionally lemon-flavored anyway, I figured adding the two ingredients wouldn't be too much of a stretch. Emily, who was helping me make these, just rolled her eyes and muttered something about "the missing ingredient."


I've never actually eaten a madeleine until today, but these were really fantastic. Light and fluffy yet chewy, sweet, buttery, and just slightly lemony. Couldn't really taste the rum, but I didn't really miss it. The cakes were delicious by themselves, but I imagine they'd go great with tea.

Lemon Rum Madeleines

Ingredients:

- 2/3 cup flour
- 1/4 tsp baking powder
- 1/2 cup butter, melted and cooled
- 2 large eggs
- 1/2 teaspoon rum extract
- 1/2 teaspoon lemon juice
- 1 cup powdered sugar

Steps:
(1) Preheat oven to 350.
(2) Spray madeleine pan with Pam or other non-stick spray.
(3) Mix together flour and baking powder in small bowl. Set aside.
(4) In a large bowl, beat together eggs, extract, and lemon juice with an electric mixer on high speed for 5 minutes.
(5) Gradually add in powdered sugar. Beat another 5 minutes until thick.
(6) Gently fold the flour mixture into the batter.
(7) Add melted butter. Mix until smooth.
(8) Spoon one tablespoon of batter into the center of each shell indentation. (It will smooth out by itself, and pouring the batter into the center will give the cakes that signature "hump" in the middle.)
(9) Bake for about 8 minutes, or until edges are light brown.
(10) When cool, sprinkle tops with powdered sugar. (Optional!)

Thursday, May 13, 2010

Chocolate Fudge


I was in Boston the last two weeks, visiting Dan. Unfortunately, while I'm done with school already, he's still got weeks and weeks of classes and final labs left, and a thesis project to work on. Which meant, of course, that I was left to my own devises at home all day while he did complicated engineering stuff at school. I was bored. A lot. Like, really really bored. So I made fudge.


As it turns out, fudge is not exactly a complicated thing to make, but it's also not easy to make good fudge. The ingredients are simple, and the steps are straightforward, but a lot of monitoring and stirring and temperature-measuring are required. 


I don't have a candy thermometer. Dan definitely doesn't have a candy thermometer. But you need one to make fudge. I was supposed to let the chocolate boil to 234 degrees, and then let it cool down to 130 degrees before adding the last bit of butter. Obviously I had no way of measuring that so I just stuck my hand above the saucepan and said "Yup, that feels pretty hot," then turned the heat down for 10 minutes and called it day. Sometimes I think I should have called this blog "Just Winging It In the Kitchen."


The fudge turned out to be rich and intensely chocolate-y, but...grainy. That's the only way to describe it. It's like the sugar didn't quite dissolve, and you could still feel all the individual grains of that undissolved sugar. Not exactly unpleasant, but definitely not what you'd expect in fudge. After talking to Dan's mother (who is my baking idol), I've come to the conclusion that this graininess is probably the result of not having cooked the ingredients to the right temperature. Apparently my super scientific hand-over-pan method was inadequate. This can only mean one thing: time to buy a candy thermometer. 

Recipe can be found at the Food Network's website, courtesy of Alton Brown.

Tuesday, April 27, 2010

Spinach & Mushroom Fettuccine Alfredo


Why is the weather in New England so crappy? I've been in Massachusetts for almost two days already, and I have yet to experience anything but ominous-looking clouds, wind, and rain. The only upside to this crappy weather is that it gives me an excuse to cook creamy, rich, hot comfort food that would be way too heavy on a warm day.


Dan and I weren't feeling up to dealing with raw meat today, and he hates grocery shopping with me (I get too excited by all the food possibilities, apparently), so we stuck to the produce aisle for dinner. Spinach and mushrooms are a timeless combo, and great in cream-based sauces.


"Don't crowd the mushrooms!" OK, Julia. I didn't crowd the mushrooms -- at least, not as much as I usually do. And you know what? They cooked faster!


I forgot how much spinach wilts. I started out with a big ol' pile of leaves, and in seconds they had cooked down to a mere mouthful. Luckily spinach is both healthy and delicious, so I didn't think twice about tossing in a few extra handfuls.


Alfredo sauce stresses me out. I'm not a patient person, and it always feels like takes so long for the cream to thicken up, no matter how much I whisk. But shredded Parmesan cheese and a few teaspoons of flour do wonders, and by the time the everything is bubbling, the sauce is just perfect.


The afredo was hot and creamy and satisfying -- perfect for a cold spring day in Massachusetts.


Spinach & Mushroom Alfredo (Adapted from Cooks.com recipe)

Ingredients:
- 3 cups spinach
- 2 cups mushrooms
- 2 cloves garlic, chopped
- 3 tbsp butter
- 2 cups cream
- 1-1/2 grated Parmesan cheese
- 3 tsp flour
- Pinch of salt
- 1/2 box fettuccine noodles

Steps:
(1) Bring 4 quarts water to a boil. Cook fettuccine until soft, stirring constantly to make sure the noodles don't stick. Add pinch of salt. Drain and set aside.
(2) Melt butter in a skillet. Saute garlic in the skillet on medium heat for about a minute.
(3) Add mushrooms to skillet, making sure to spread them out evenly. Cook until soft and brown.
(4) Add spinach, cook until wilted.
(5) Pour cream into skillet, whisking constantly until it begins to thicken.
(6) Add Parmesan and flour. Keep whisking for about three minutes. Add salt to taste.
(7) Take off heat. Add noodles, combining until each noodle is well-coated with sauce.
(8) Serve while hot.

Sunday, April 25, 2010

Chocolate Coffee Ice Cream Cake


Now that I'm free and in the clear school-wise, my friends have been sending me links to recipes they know I have plenty of time to try out. This unique ice cream cake was at the top of the "Tina, please make this for us!" list. 


The recipe called for cake mix. Usually, I try to stay away from boxed mixes. I just feel so much more accomplished when I make things from scratch, you know? But no one can a culinary superstar all the time, and there's just no denying that sometimes boxed mixes just taste better.


So, what's so special about this cake? It's made with ice cream! But not like a Baskin Robbins ice cream cake, where there's a layer of ice cream sandwiched between layers of cake. Here, the ice cream is literally mixed into the batter. For this cake, I chose coffee flavored ice cream.


The ice cream in this recipe acts like a substitute for milk in a regular chocolate cake, but the resulting batter is a lot creamier in consistency.


The batter looks a lot like melted ice cream going into the oven, but it turns out to be a pretty nice cake. Just be sure to thoroughly grease and flour (I dusted with cocoa powder) your bundt cake pan, or you'll end up with only half the cake on your plate like I did. Ugh.


I am absolutely going to add ice cream to every cake I bake from now on. I couldn't really taste coffee at all, but the cake was unbelievably moist and soft -- probably the best cake I've ever made. Chocolate ganache was a great touch, but the cake is so good by itself I may not use any kind of icing next time.

Recipe and backstory can be found here.

Friday, April 23, 2010

Pad Thai


When my friend Jill graduated (early!) law school back in December, she treated herself to a trip to Thailand. In between relaxing and sightseeing, she squeezed in a few cooking lessons, and brought back tons of awesome new recipes to share. At our most recent girls' night dinner, she showed me, Emily, and Leslie how to make pad thai.


I was pretty excited for this dinner, not least because this was my first time hanging out with Jill in about 4 months. What really sweetened the pot, though, was the fact that Jill is currently house/dog-sitting for a girl that works at Williams-Sonoma and has access to a kitchen stocked with all kinds of sweet cooking equipment. Just looking at the huge selection of mixing bowls this girl had made me feel consumed with envy!


I was too busy gushing over the fact the girl owned a mortar and pestle to be useful, so Emily decided to move things along by taking charge of the cashew crushing. Sure, we could have used a food processor or even a knife/cutting-board, but...there was a mortar and pestle!


I knew I would like this recipe when I saw the dried baby shrimp. Asian people love this stuff, but American's tend to shy away from food with eyes, so these little suckers have had a limited presence in my life since I moved out of my parents' house. What a shame!


After all the ingredients had been chopped and prepped, the first course of action was to make the pad thai sauce. Here is an action shot of Jill crushing palm sugar against the side of the wok with a spatula. Once the liquid started to boil, crushing became a lot easier, and the combination of sugar, orange juice, tomato paste, lime juice, and soy sauce started to smell pretty awesome.


After the sauce was ready and set aside, the rest of the recipe just flew by. Scramble some eggs with tons of garlic, add peeled prawns, toss in rice noodles, tofu, green onions, bean sprouts, etc. Mix together with sauce, top with cashews, then serve!


At this point the kitchen was full of all sorts of interesting smells, and the resident beggars came around to investigate. Meet Argos and Nezza. These beauties are both rescue dogs, and are pretty much the friendliest, smoochiest, most well-behaved puppies I've ever seen. Jill helped her friend adopt both of them through Lucky Dog Animal Rescue about a year ago, and she tells me that there are a lot of awesome puppies still looking for homes. Please check out the website and see if you can help today!


The pad thai was savory, tangy, hearty and satisfying. Great for a girls' dinner with some wine on a cold and gloomy spring day.


Pad Thai (Recipe is for 1 serving, increase ingredients as needed for larger portions.)

Ingredients
(Pad Thai Sauce)
- 3-1/2 tbsp tamarind juice (We used orange juice instead)
- 2-1/2 tbsp soy sauce
- 3 tbsp palm sugar
- 1 tbsp lime juice
- 1/2 tsp salt
- 1/2 tbsp tomato paste
- 1 tbsp white sugar

(Pad Thai)
- 3 tbsp vegetable oil
- 1 clove chopped garlic
- 1 egg
- 5 peeled prawns 
- 100 grams rice noodles (pre-soaked for 30 minutes)
- 1/4 cup prawn stock or water
- 1/2 tbsp dried shrimp
- 1/2 tbsp dried sweet turnips, chopped
- 2 tbsp deep fried tofu
- 1 tbsp cashew nuts, chopped
- 40 grams bean sprouts
- 20 grams chives or green onions, chopped

Steps:
(1) Start with the sauce. Combine the tamarind juice, mushroom soy sauce, palm sugar, white sugar, salt, and tomato juice. Bring to a slow bowl and stir constantly to ensure the ingredients are smooth and well-combined. Add lime juice and stir. Set sauce aside for later.
(2) Heat the wok with vegetable oil.
(3) Add garlic and stir-fry until fragrant.
(4) Add egg and scramble until well-mixed with garlic.
(5) Add prawns, and cook until pink.
(6) Stir in rice noodles and prawn stock. Stir until noodles are soft.
(7) Mix dried shrimp, sweet turnips, tofu and cashews.
(8) Pour in pad thai sauce. Mix well.
(9) Add bean sprouts and green onions.
(10) Garnish with a lime wedge and serve!